Paint a Red Rose in Acrylics
Easily paint a red rose tutorial in acrylics! Painting red roses can be tricky because of the nature of red paint. I show you how to paint this step by step.
Let’s paint a red rose, a step by step tutorial with video that makes it easier for everyone! Beginner friendly and fun for experienced painters too!
No time now? PIN for later..

This post contains affiliate links. If you make a purchase after clicking a link I may make a small commission at no added cost to you.
I could never paint red roses to my liking and I finally figured out I was going about it backwards. This method is so easy it makes me wonder why it took me so long to get it.
I am still testing different reds for more variety but this is what we have for now.
I used a #12 Flat one stroke brush throughout. On another rose I used a round for the center. I like both the same.
In this step by step tutorial it is important to note that when you double load your brush that you keep the dark shadow color, whether Licorice or Burnt Umber, minimal. For example:
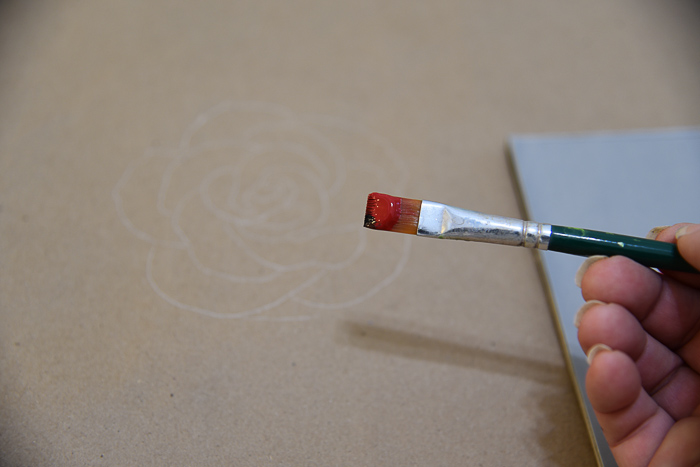
Also worth noting, the dark color will begin to walk over into the red and you reload again and again. Clean out your brush and reload fresh to keep it from muddying up your paint.
A free printable pattern is available in the Subscribers Resource Library, fill out the form below to get your password. (if you are already a subscriber your password is at the end of every email I send)
Get Started Painting a Red Rose
1. Using the chisel edge the first few strokes are very small comma or u strokes opposite each other with the Black to the lower side.
I alternated between black and burnt umber throughout this lesson. You choose when and where you want to use which color, or you can just use the black, it does give it a lot of drama but you have to be very careful to keep it a slight amount.
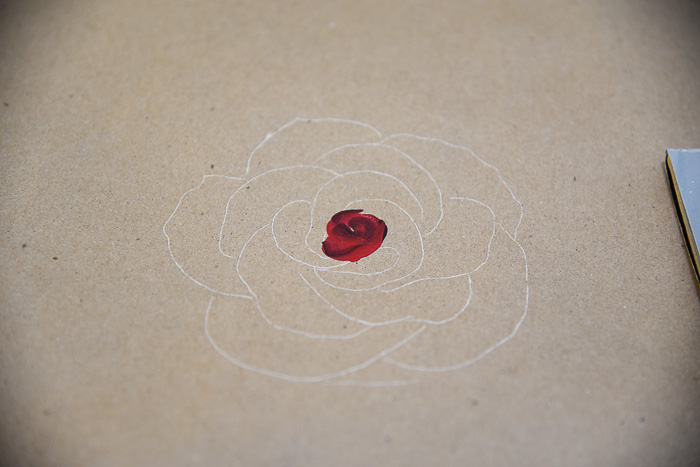
2. Look at your pattern, carefully determine which stroke should come next. The petals grow in a spiral around the center. I chose the one closest to the center.
Using a comma stroke with the black towards the center I stroke in the next petal.
(new here and don’t know what a comma stroke or double loading is? Then see Basic Strokes for a full explanation)
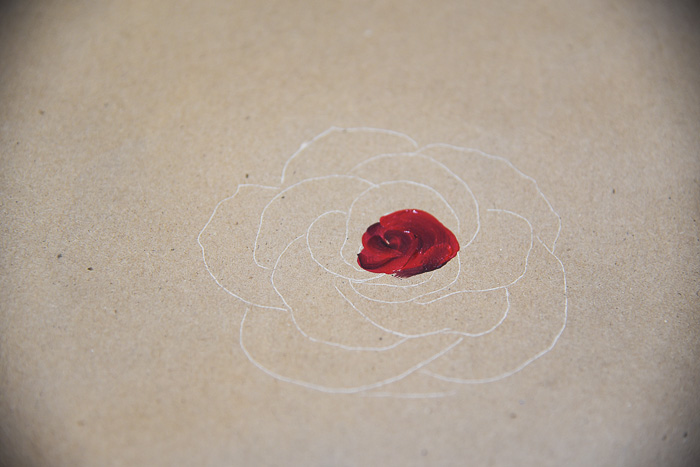
You will note it is not a perfect comma stroke. Don’t worry about being perfect! We are going for an effect not perfection or realism.
Reload your brush frequently, if not every stroke, as you work. If the black starts taking over the red, wash and reload.
3. Working around the center stroke in your next two strokes. These are comma strokes.
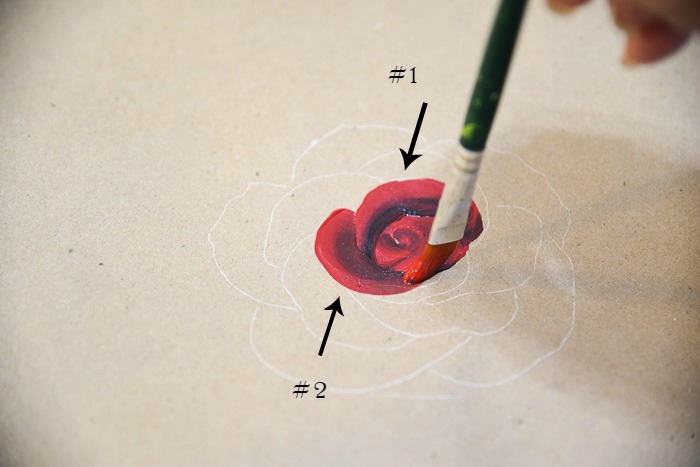
Remember, you can use the same pattern over and over and you will never create the exact same rose, embrace the diversity.
4. Add the next 3 strokes. The first one is more of a chisel stroke than a comma stroke. You will also note that the comma strokes vary in size and width.
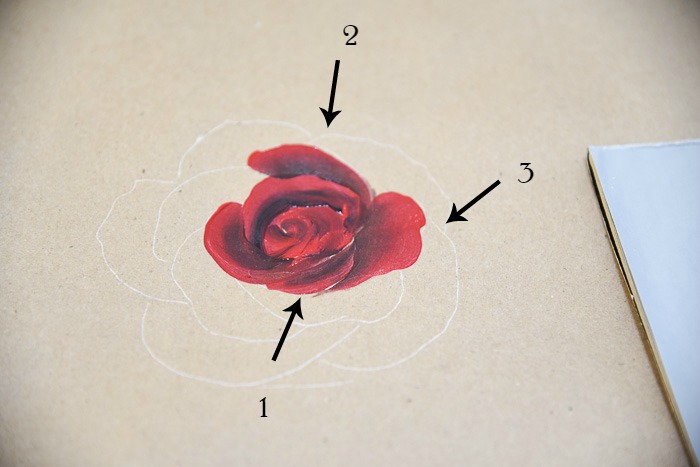
Keep your Colors Clean
5. By this time really check your brush to be sure the shadow color is not beginning to take over your red.
The next 3 strokes are shown in order here but you will note how #3 is too dark, the shadow color has walked across to the red and overpowers it. I will over-stroke that petal with more red but it is hard to cover the dark well. It will tend to dull that petal.
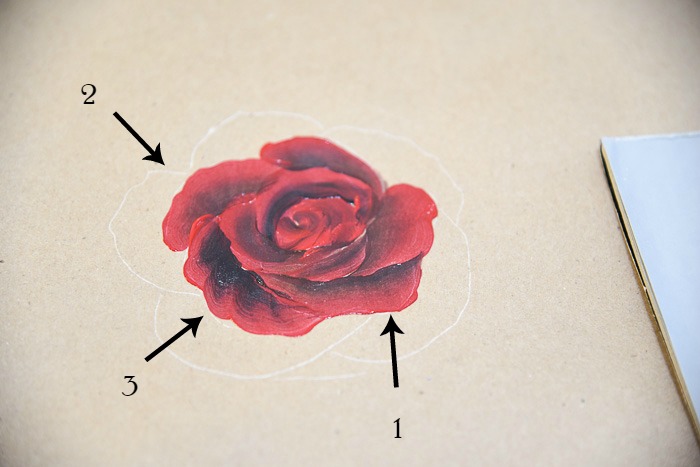
6. Continue to layer petals in a logical order. The video will be most helpful when you view it. The outer petals really start to make it look like a rose. You can add in a touch of a more orange red to the red side of the brush to give it a highlight.
Note on Highlighting Reds
To keep the rose looking red and dramatic only highlight with an orange, if you use white it will tend to make it look pink.
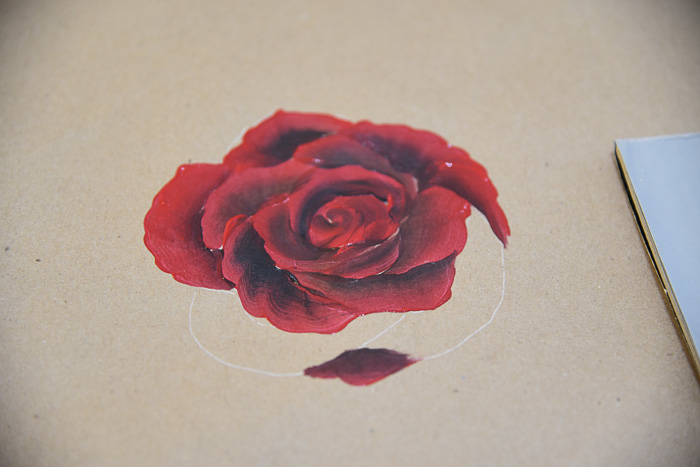
7. Now add the final petals and step back to see what it may need. Do you have some gaps showing?
Just tap some paint in with the corner of your brush, or if you like, use a script liner with a touch of paint on it.
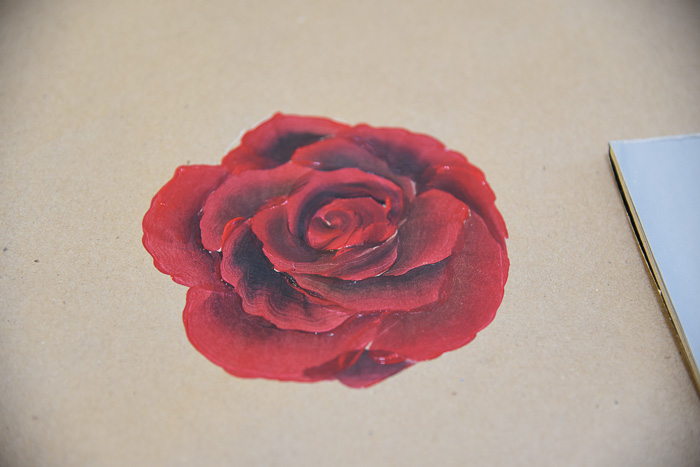
In the video I paint the red rose on a light colored background. With red you want to undercoat with a red to give it depth. Red acrylics are not opaque and you need that extra layer to achieve that deep rich red.
Supply List (you can find most of these colors in your local craft store or here on Plaid Online)
Plaid FolkArt Multi-Surface Paint
Engine Red
Cardinal Red
Licorice
Burnt Umber
Pure Orange
Leaves ~
Thicket
Citrus Green
#12 Flat One Stroke Brush
The pattern is in the Resource Library, current subscribers you have the password in your latest email.
Not yet a subscriber? Subscribe to our newsletter to gain access to free painting patterns.
I wish you Happy Painting!
Please PIN and share!


Beautiful color and fantastic rose!!!
I’m going to try this rose. I’tried Several and have not been happy with the one s I,be done. Will post when finished. Thank you for the drawing as it makes sense.
Thank you Pamela!! Love the red rose! I think I can do it!!
Thanks Pamela. I love your “back-to-front” explanation and theory. It really works and I will give it a try.
Fantastic lessons.