Paint a Cardinal in Acrylics
Paint a Cardinal in acrylics, an easy, step-by-step tutorial with a free video. A beginner-friendly lesson that anyone can do. Grab your paints and let’s paint a cardinal or two!
How to Paint a Cardinal in acrylics. Yes, you can paint cardinals. They make a great design to put on gifts, winter-inspired crafts, and in acrylic canvas paintings.
Be sure to PIN and share!
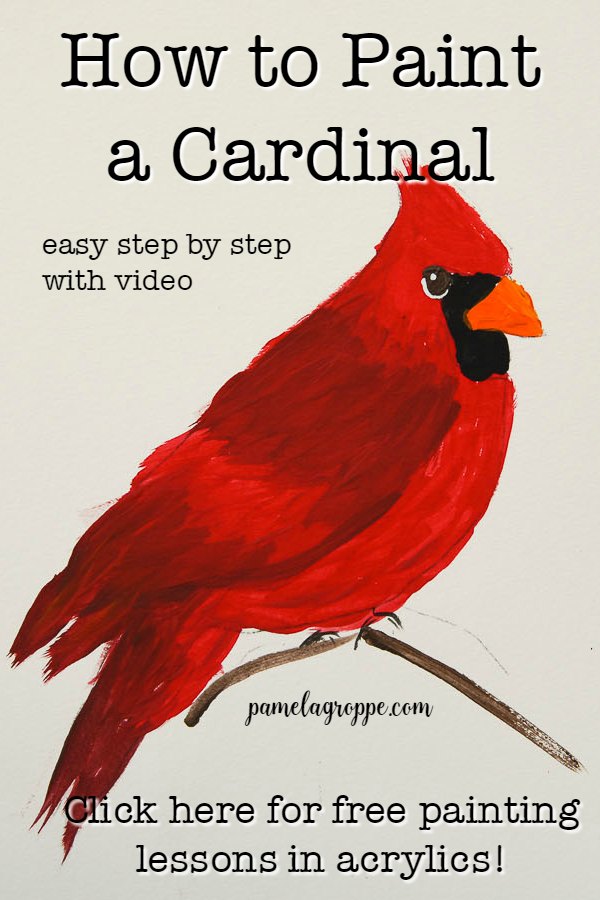
Let’s jump right in. (supply list is at the end of this post)
Note the first video here is the fast-paced overview. The full-length, real-time video is at the end of this post.
Transfer Pattern
1.Transfer Pattern to the surface using graphite paper. (see all my Basic Painting Supplies here)
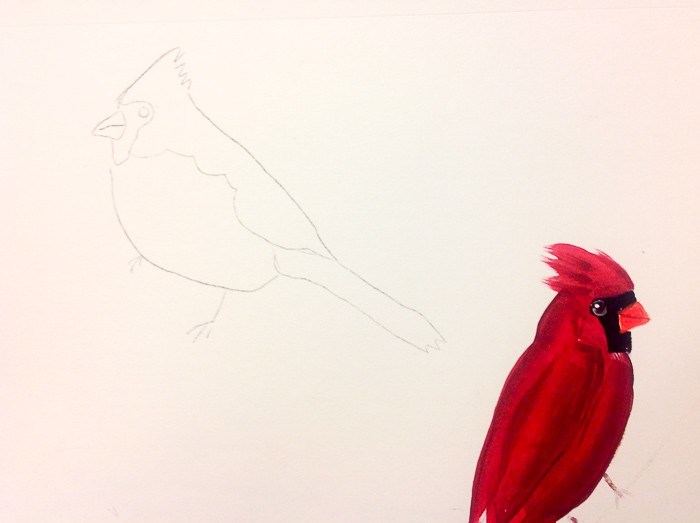
You can see the other practice cardinals I had worked on, over and over.
I demonstrated both the right-facing and left-facing cardinals in my video but here I will just demo the fatter of the two.

Want an ad-free PDF of this post? It includes not only the step-by-step shown here but a pattern of both birds for your personal use. Click here to get the pattern packet, Cardinal Pattern & Workbook
Paint a Cardinal Body
2. Double load a #10 flat brush with your Cardinal Red and Burnt Umber.
Completely fill the brush with the Cardinal Red then work in a bit of Burnt Umber on one corner of the brush.
3. Stroke on the back of the cardinal making sure the Burnt Umber is along his back edge. Pull the brush to a point at the end of his wing.
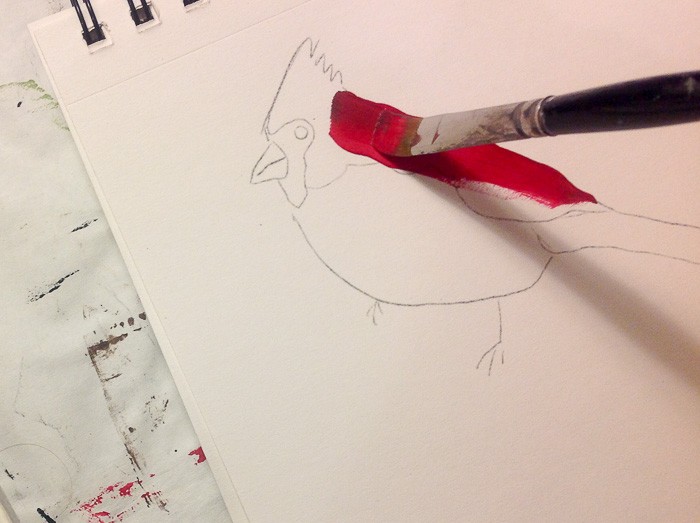
4. Reload the brush with the Cardinal Red and Burnt Umber then stroke on his belly, making sure the Burnt Umber is along the outside edge.
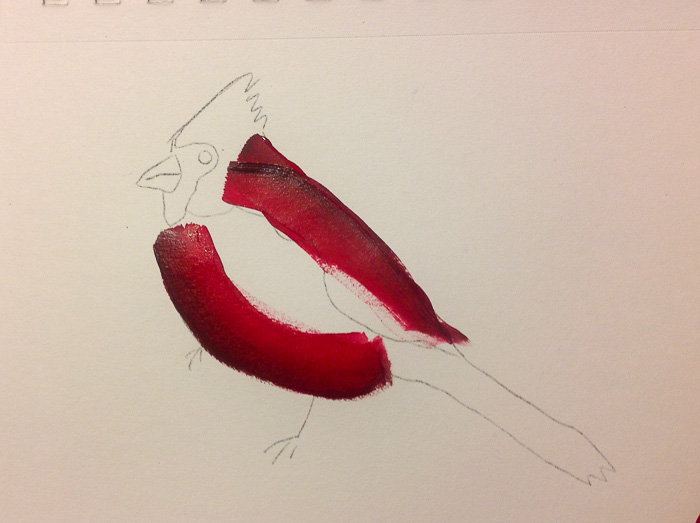
5. Dry wipe out your brush and fill with just the Cardinal Red and fill in the rest of his tummy.
Because the red is not opaque you will still be able to see your lines for his wing.
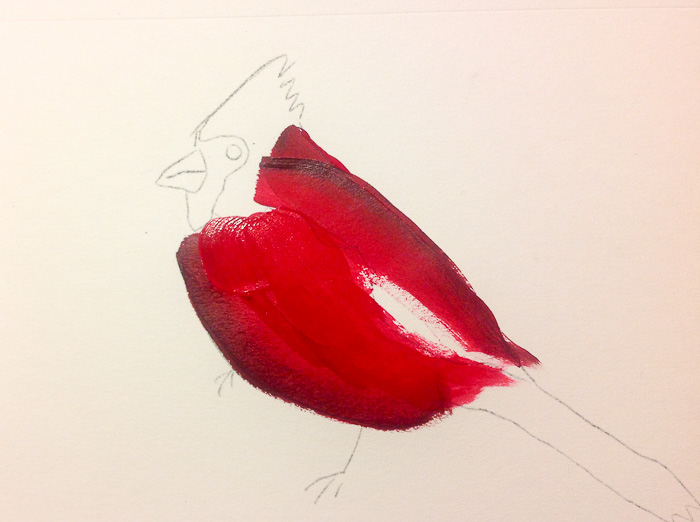
Paint the Cardinal’s Wing
6. Rinse the brush, press on a cloth to remove excess water.
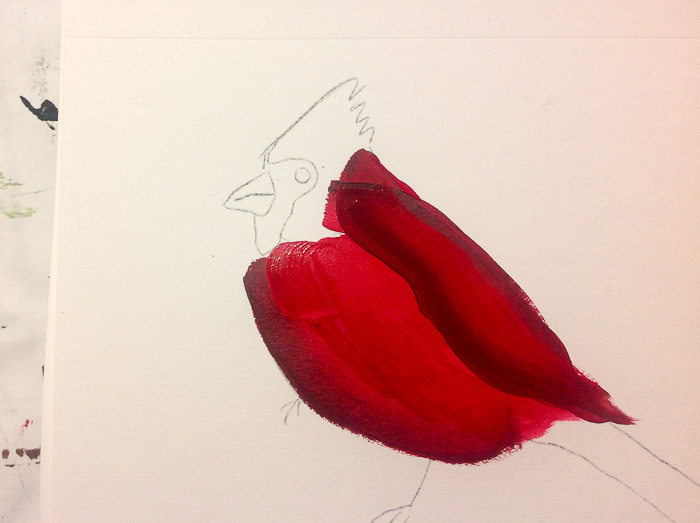
Double load your brush with the Cardinal Red and Burnt Umber, and stroke on his wing with the Burnt Umber edge following the line of the wing.
Don’t overthink it or try to be perfect. It will take you a few practice runs so just go with it and enjoy getting the feel of it.
End at a point at the tip of his wing by turning your brush as you glide to your stopping point.
I am getting some dry edges on mine here as I am working on paper but on a base-painted canvas or on a painted wood surface it will be much smoother.
Paint a Cardinal Tail
7. Let’s start on his tail. Paint in the tail feathers with short choppy strokes using the chisel edge of the brush and work your way up to the base of his wing and tummy.
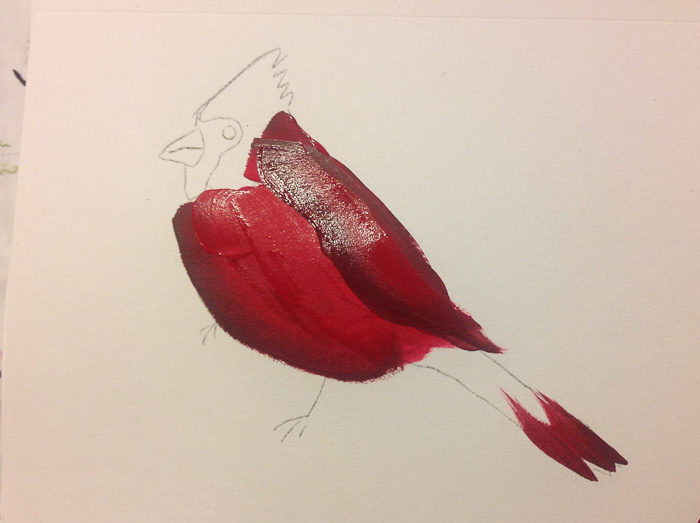
Keep layering until you have filled it in.
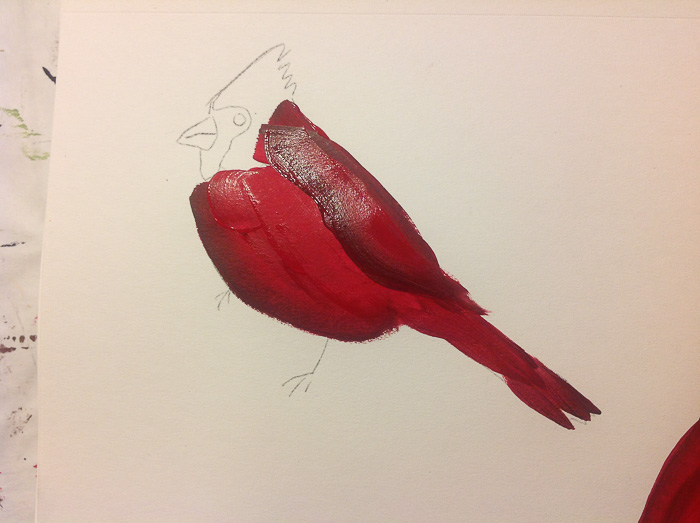
Can you see how I missed some of the tracing at the end of the tail, don’t try to fill it in, the traced pattern is just a guideline.
You can come back and erase that if you have used the graphite paper (carbon paper is different than graphite and will make a big mess if you try to erase it so be sure to get the graphite paper, the best eraser is listed in my Basic Supplies post)
Paint a Cardinal head
8. Dry wipe out your brush and fill with only Cardinal Red.
It may have a trace of burnt umber left in it but for the most part, you should’ve been able to remove it.
Don’t wash the brush, a wet brush will just thin out the red more and we don’t want that.
With your loaded brush use the chisel edge stroke to in the feathers on his head.
Use choppy strokes to paint his crest. Don’t worry if you get a little red into the mask area, the black will cover it easily.
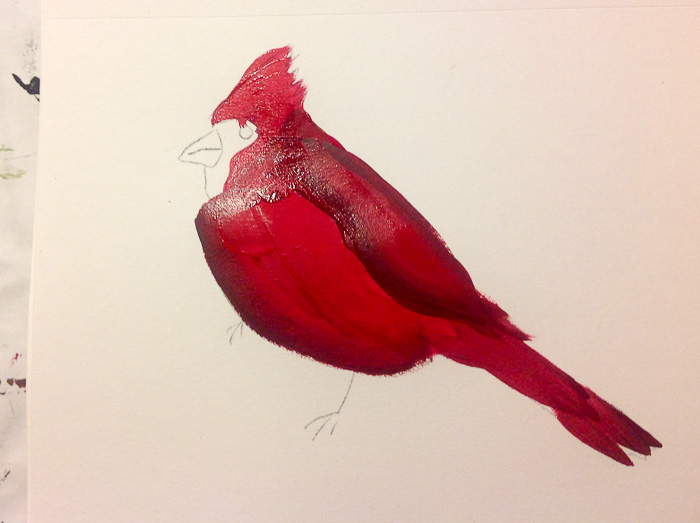
9. Switch to your liner brush. Using a smaller brush will help you keep control in the small area of the mask.
Just fill in the mask area with Licorice.
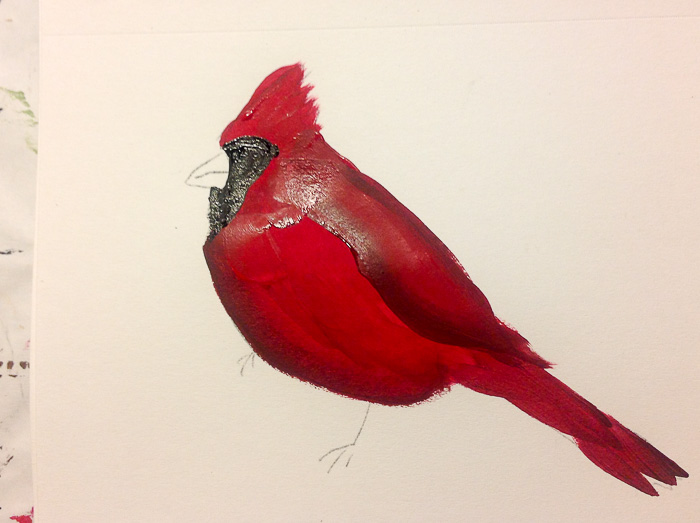
10. Dry wipe out your brush and load it with Burnt Umber.
Paint on a circle for the eye. Though it is hard you will be able to see it on the black. I am not sure how well you will be able to see it in the photo.
It is barely perceptible here but in real life you can see it… (if you squint with one eye and close the other)
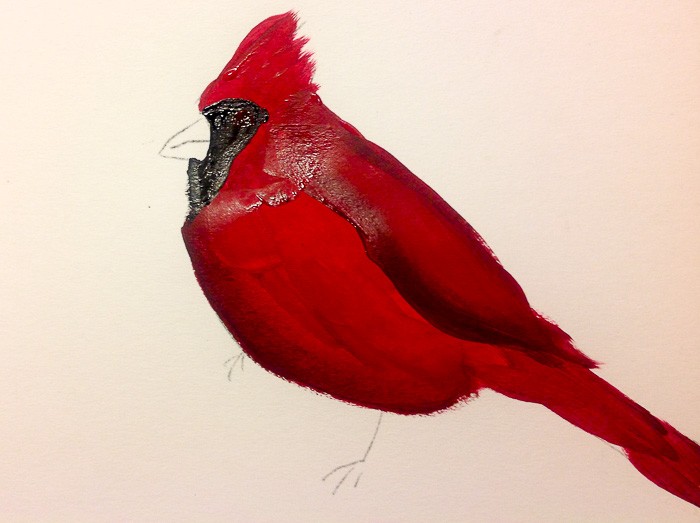
11. Clean your brush and pinch dry.
Load with Orange and fill in his beak, you can add in some Cardinal Red if you think it needs a bit of shading and texture.
12. Wipe out your brush and load with thinned-out black to add the line in his beak.
Make sure to pull your brush to a point with the black so you can make a very thin line. (or you can mix a wee touch of Burnt Umber with some Orange to create the line, it makes it less pronounced)
13. Dry wipe the liner brush again, getting out as much of the color as you can.
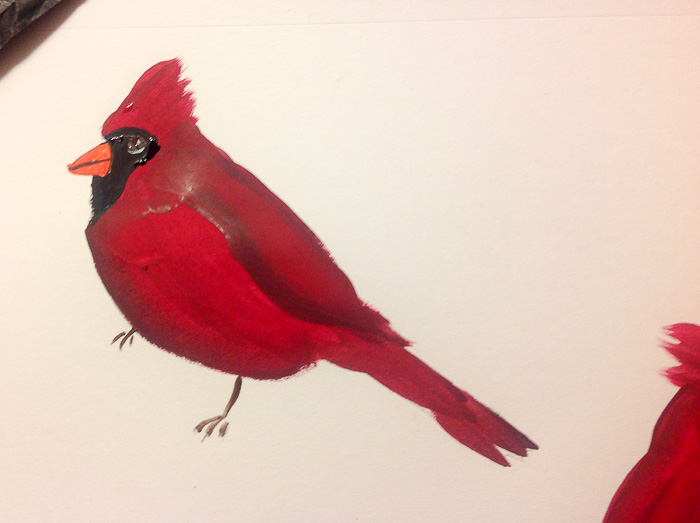
Load with White, don’t fret if the color left in your brush shades it a bit, you really don’t want it stark white, line parts of the eye.
You may only want to do the bottom or you may feel it needs a bit around the top. Each bird will be different and you will need to make the call on how much to go around the eye with the liner.
Put a dot of White at the top and toward the back of your eye circle for a spark of light.
Feet & Legs
14. With Burnt Umber and you liner brush paint on his legs and feet.
Ta da! You now have a cardinal bird.
Paint a Cardinal
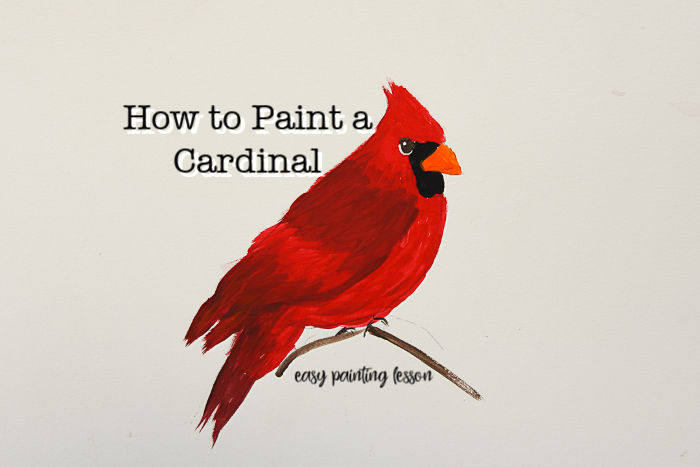
How to paint a cardinal one stroke at a time in acrylics. Beginner friendly painting tutorial.
Materials
- Surface to paint - I demonstrated this on paper
- Plaid Folk Art Bottled Craft Acrylic Paints:
- FolkArt Cardinal Red
- Burnt Umber
- Pure Orange
- Licorice
- Wicker White
Tools
- Brushes
- #10 Flat Brush
- #1/10 Liner Brush
Instructions
- Transfer pattern to surface
- Paint Cardinal body
- Paint Wings
- Paint Tail
- Paint cardinal head
- Paint mask on face
- Paint cardinal's eye
- Add details
Notes
Don't try to be perfect. Cardinals come in many shapes and sizes. Just have fun!
Supplies:
Surface to paint – I demonstrated this on paper
Plaid Folk Art Bottled Craft Acrylic Paints:
FolkArt Cardinal Red
Burnt Umber
Pure Orange
Licorice
Wicker White
Brushes
#10 Flat Brush
#1/10 Liner Brush
A book on painting birds I am enjoying now..Painting Garden Birds.
Do you want to purchase a pattern packet? It includes not only the step by step shown here but a pattern of both birds for your personal use. Click here to get the pattern, Cardinal Pattern & Workbook
My pattern packet sales help to support this blog and my endeavors to provide free painting tutorials for everyone.
I want to thank you all for purchasing my patterns and my signs & paintings in my shop.

More Painting Tutorials to Enjoy
How to Paint an Aspen Tree (something to perch your Cardinal on)
Paint a Chickadee




Thanks for the painting tutorial, I think I will try these.
They are fun and each one turns out unique.
Thank you for tutorial. Excellent instructions. Can you do one for a butterfly
Sure, I can do that!
How fabulous that you show us how to do this! I pinned this so that I can try to do this sometime soon!
Thank you!
I will be adding a red cardinal in my painting..
Hi Pamela! I followed your cardinal tutorial for a refrigerator magnet I’m handpainting for the Phoenix 2019 convention. Thank you!
Thank you so much for this tutorial. A friend of mines husband just died. Between the 2 of them, they have 5 children and one on the way and she is only in her twenties. I paint, but mostly lettering. I am beyond excited to paint a cardinal for her, as it was her husband’s favorite bird❤
I am so glad I could help. Please do share when you complete it. I would love to see how it came out.
HI PAMELA..THIS IS BY FAR THE EASIEST CARDINAL TUTORIAL IVE FOUND…THANK YOU SL MUCH FOR TAKING YOUR TIME AND EXPLAING THIS IN AN EASY..RELAXING WAY …TY
IM ENTRANCED WITH PAINTING CARDINALS, ENJOYING YOUR METHODS.
THANK YOU. IF EVER YOU PUBLISH A WORK BOOK, IM INTERESTED.