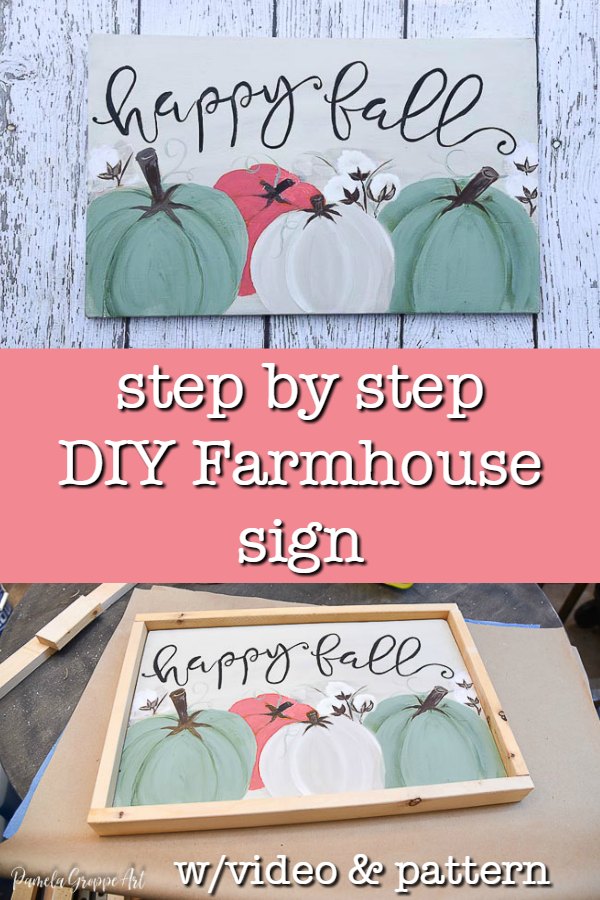
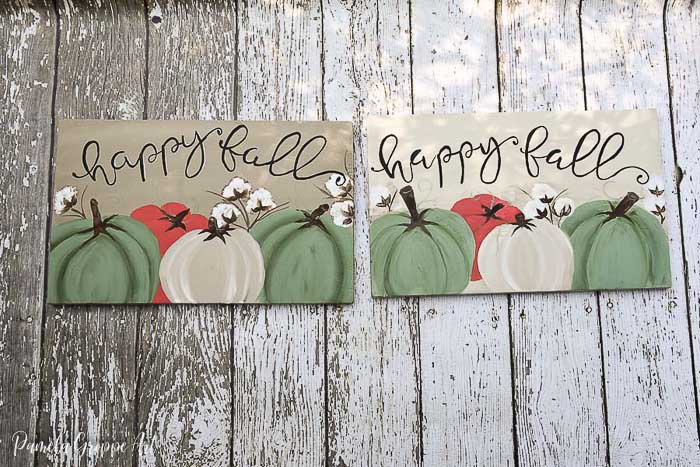
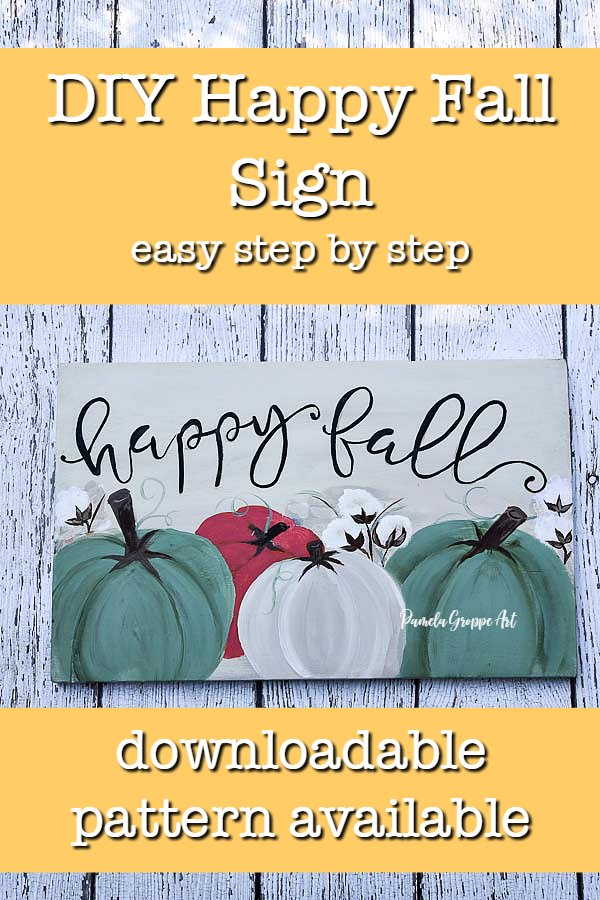
Paint a Fall sign with Pumpkins and Cotton Bolls
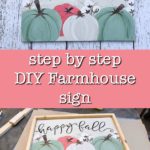
Paint a Fall sign with pumpkins and Cotton bolls. Step by step painting tutorial easy enough for beginners!
Do you love hand painted signs for your Fall decor? I have created this painting lesson just for you. You are going to love this DIY Fall sign with Pumpkins and Cotton Bolls.

This post contains affiliate links. If you make a purchase after clicking a link I may make a small commission at no added cost to you.
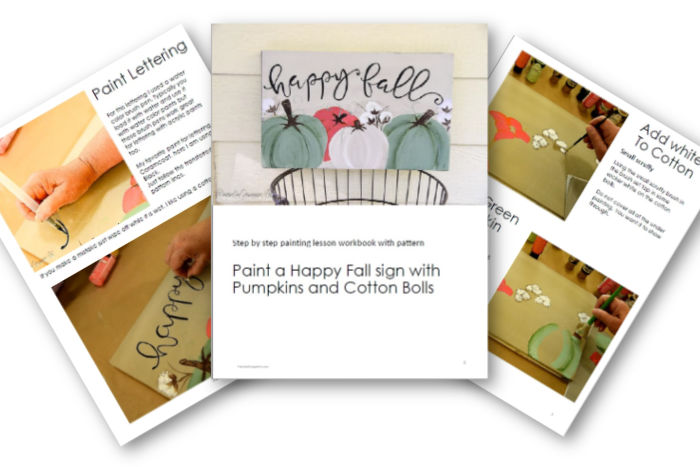
Fall sign painting tutorial workbook
A step by step workbook is available for download and print. 18 pages of helpful photos, instructions along with tips and tricks. A printable pattern is included for you to trace.
Lets get painting.
Paint a Fall Sign with Pumpkins and Cotton Bolls
Easy DIY Fall sign with pumpkins and cotton bolls. Easy painting lesson for beginners.
Materials
- Plaid Folk Art craft acrylics and Multi Surface:
- Wicker White
- Butter Pecan
- Boulder or Mushroom
- Burnt Umber
- Succulent
- Thunder Gray
- Thicket
- Pure Orange
- Fire Coral
- Surface of Choice:
- I used a 1 x 12 pine board cut to 18 inch length
- Sealer: Varathane Spar Urethane (water base) in sheen of choice. I typically use Satin or Semi-Gloss
Tools
- Donna Dewberry One stroke Brush Set
Instructions
- Base coat sign with background. Use a double loaded 2 inch brush and blend colors as you stroke the paint on the wood surface.
- Let Dry
- Using pattern transfer the design
- Paint under color of orange pumpkin
- Paint under color for Cotton bolls
- Paint back pumpkin with Pure Orange and Fire Coral
- Baint Cotton Bolls with Wicker White, don't cover all the base
- Paint Green pumpkin with Succulent and Thicket
- Add Cotton boll details, stems and calyx
- Paint the White Pumpkin with Thunder and Wicker White
- Paint pumpkin stems
- Add details like curlicues, more stems etc
- Paint lettering
First start with a surface. This board I used measures 11.25 x 18. I actually am reusing a piece of pine board from a previous sign I had made.
If you want to find something close in size that is pre-cut I found this nice one on Amazon. You would have to adjust the pattern a bit but it would work great.
Also if you want to use a pine board like I did then your local building center store like Home Depot, Lowes or a lumberyard will cut a 1 x 12 pine board to size for you and you will have more pieces to use for other projects.
Paint Fall Sign Background
Base coat the piece with your background color of choice. On one of these signs below I used Plaid FolkArt Mushroom with Wicker White and on the other I used Boulder with Wicker white.
The back ground is easy enough. Just double load your 2 inch craft brush with your color of choice and white.
Related: Double Loading and Basic Brush strokes
Brush the double loaded brush across the surface horizontally. The colors will blend as you stroke. Do not over blend, you want the variations in color for interest.
Related: How to Paint a Neutral Background. Note: you can do a solid color if you prefer
Related: Paint a Faux Wood Background
Let the background dry. You can speed it up with a hair dryer. Keep the blow dryer set to a low heat setting and keep the it back about 6 to 10 inches. Heating the paint is not a good thing, the air moving across it is what is needed to dry the paint.
Transfer painting pattern
Transfer the pattern to the surface using graphite paper. I used white graphite for this project.
Related: How to Transfer Patterns
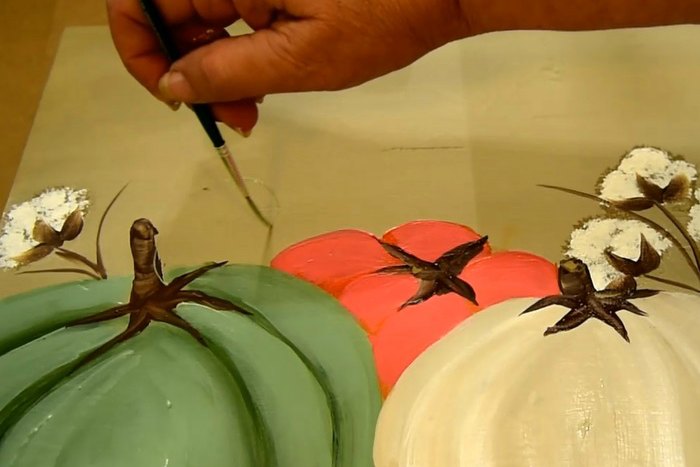
Paint design from back to front
Start with the very back pumpkin. The under painting of the coral pumpkin is Pure Orange. Just fill in the segments with a #12 flat brush.
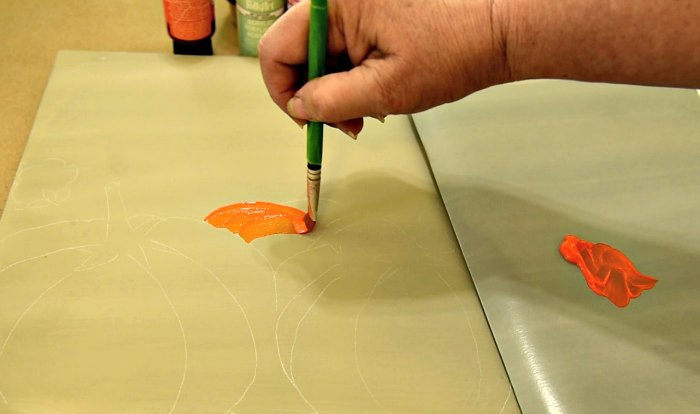
Let that dry.
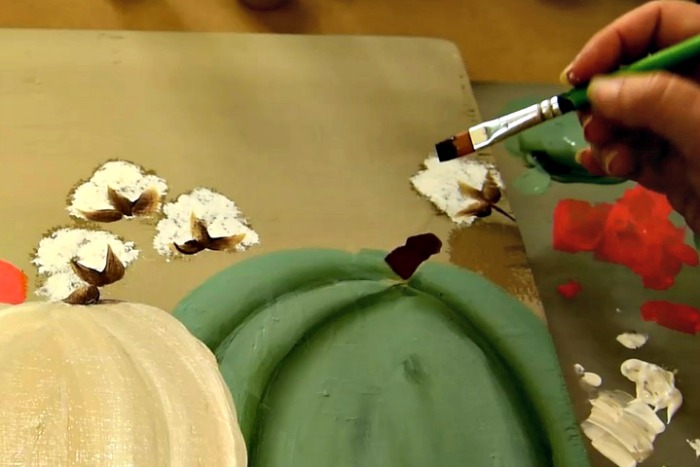
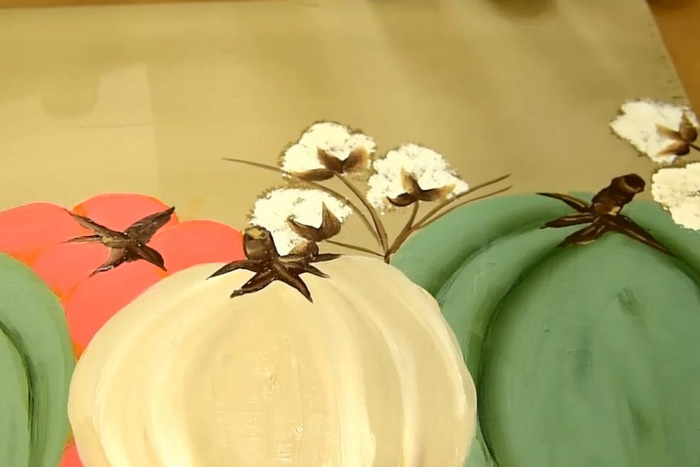
Paint Cotton Bolls
Next up we will base paint the cotton bolls. Use the 3/4″ scruffy brush that comes in the brush multi-pack. Load it with Boulder or Mushroom.
Tap lightly onto your surface, loosely follow the shapes of the pattern lines. Twist and turn the brush as you tamp on the paint. (see video linked below)
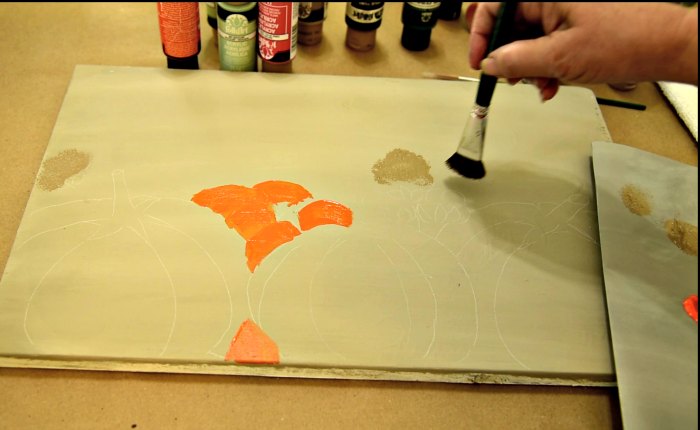
Let that dry, it should only take a few minutes or use a hair dryer on it.
Paint Orange Pumpkin
While letting those dry paint in the back pumpkin with the #12 flat brush and a double load of Fire Coral and Pure Orange.

Follow the rib lines with Pure orange on the outside edges.
Using the smaller Scruffy brush that comes in the pack, load it with Wicker white by tapping it into the edge of a puddle. Lightly tap off some and pounce on the base coat of the cotton bolls.
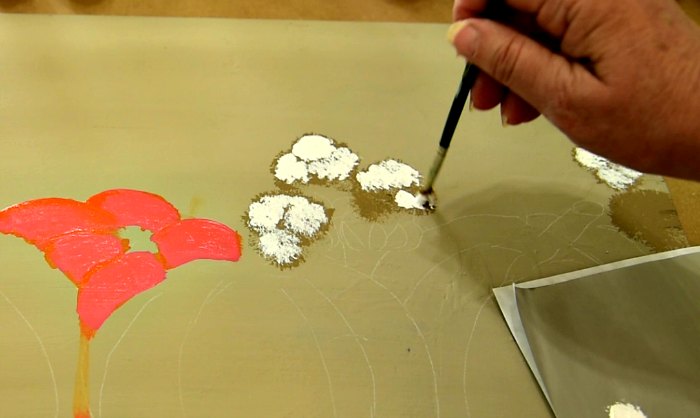
Be sure to leave some of the base paint showing, this will help give it dimension. Keep the shapes looking rounded. Move the brush around as you pounce up and down.
Paint Green Pumpkin
While the cotton bolls are drying double load the 3/4″ flat brush with Succulent and Thicket.
Don’t know what I mean by double load? See this post for Basic Brush stroke techniques.
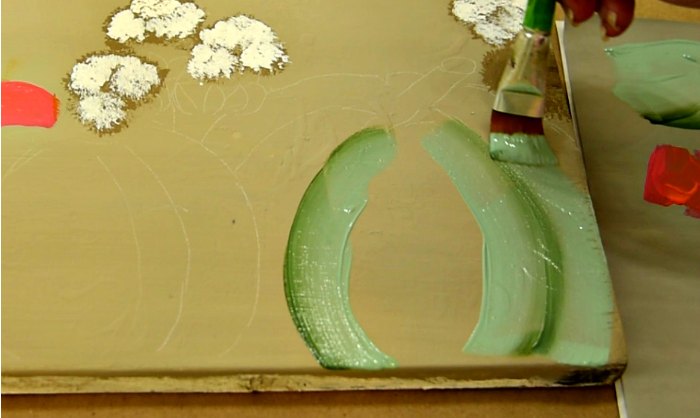
You may need to go over your green pumpkins a couple times. Blend the paint slightly along the ribs. You don’t want a solid line there.
Tap to Watch the video to paint along with.
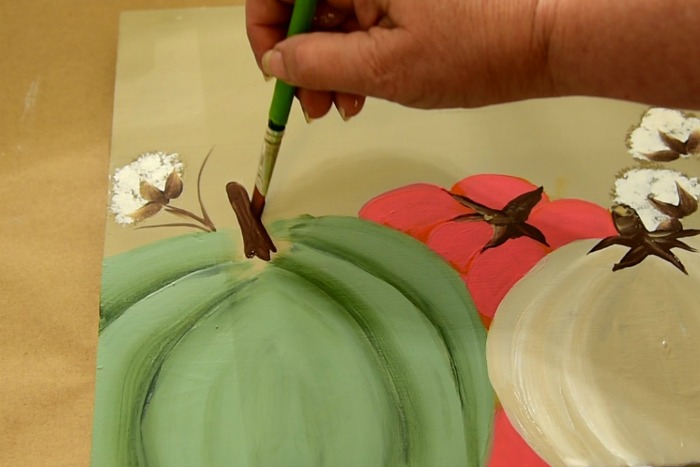
Cotton Boll Details
For the stems holding the cotton bolls you will use a slider leaf stroke. The instructions for that stroke is in the Basic Brush strokes lesson.
Double load the #8 flat brush with Burnt Umber and Butter Pecan. Paint on the 3 slider leaf strokes as shown to create the base details.
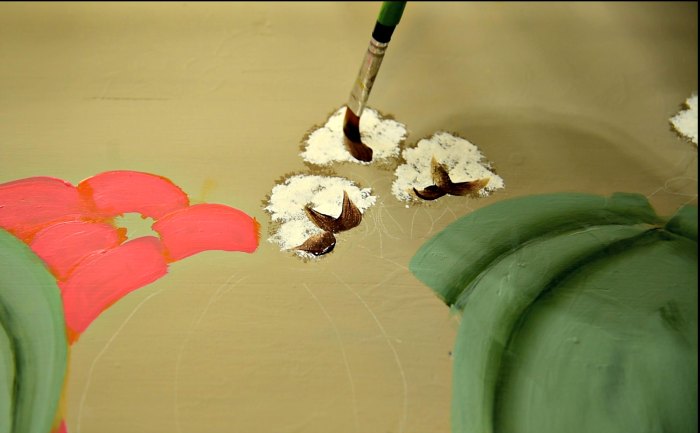
Reload your brush with Burnt Umber and Butter pecan and make sure you have a good chisel edge on your brush. Drag a thin line from the base of the cotton boll, using a light pressure to create a stem.
In the video I do some stems now and some later. You choose how and when you want to add them. No hard rules here.
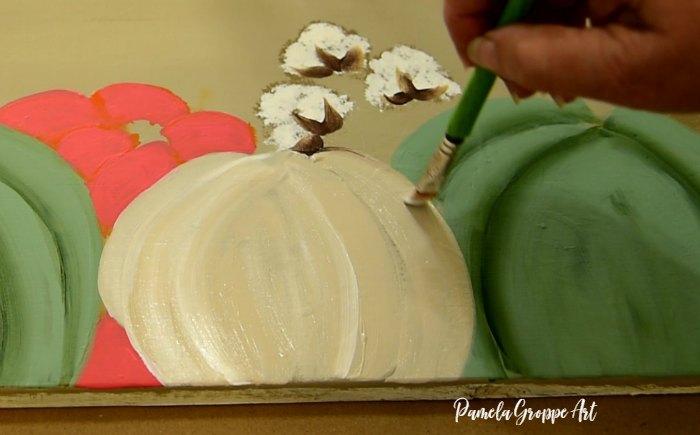
Paint the White Pumpkin
For this pumpkin use the #12 flat brush. Double load with Thunder Gray and Wicker White. Following the pattern lines stroke on the ribs of the pumpkin.
Work with it until you are happy. In the video I show how I messed it up then corrected it. Learn from your mistakes.
The white is the section ribs instead of the darker Thunder Gray. The wonderful thing with acrylics is if you hate it when you are done you can just go over it after it has dried and try again.
Fixing your errors is a great part of learning to paint. We make them all the time and always use it as a learning experience and not a failure.
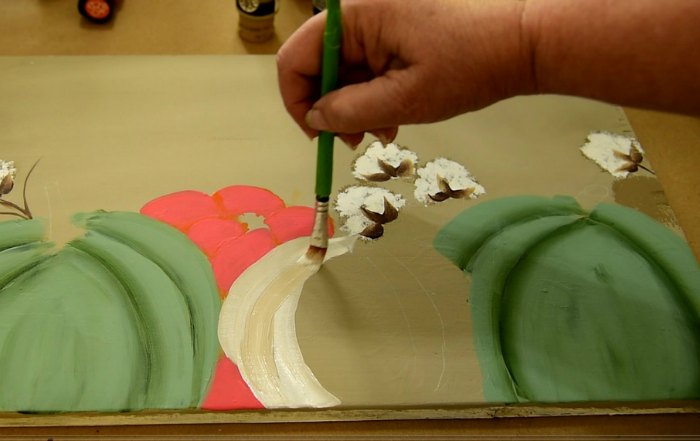
Paint Pumpkin Stems
Load your #12 flat brush with a dark brown, I like burnt umber best but you can choose your favorite. If you prefer a smaller brush for better control use one of the other sizes in the multi pack found here.
Pumpkin stems can be lots of different colors so don’t think you have to paint them brown. Follow the pattern lines for the stems and fill in with the brown. Nothing fancy just paint it in.
Continue painting stems making each one unique in size and shape. Some are short and stubby while others are longer.
Bring the stem down into the pumpkin ribs a touch. Start wider then end to a point.
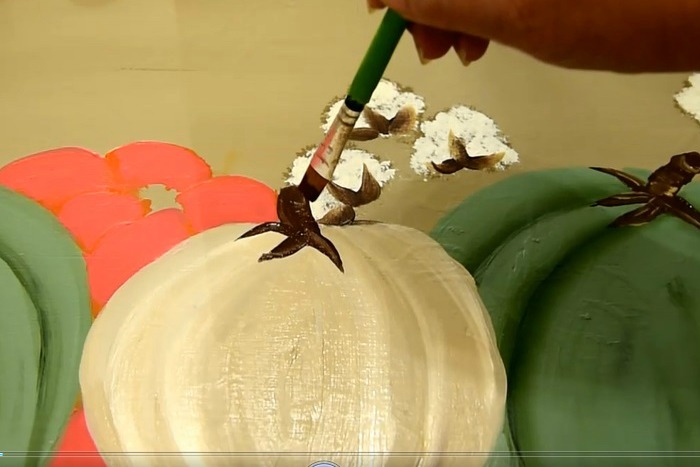
Wipe or wash your brush clean and add a touch of Butter Pecan or Wicker white to your brush and add some highlights. You can do this while the Burnt Umber is still slightly wet and blend it in or when it is dry. Try both ways and see what works for you.
Now lets add the rest of the cotton boll stems using the chisel edge of the #12 flat brush or a liner, if that suits you better. They are easy enough. Just a long thin line. Add a few stems alongside for interest.
Next using the liner brush and inky paint stroke in some swirly lines. I will admit to being lousy at this but I always try. The color is rather faint but I wanted them to be soft and subtle.
And that is how you paint the design. To see how to add the lettering please visit this post.
and that is the first portion of the DIY Happy Fall sign.
Get Printable Pattern Here! (note: this is the traceable pattern only, the step by step workbook with photo and instructions is available with the button below.)
Click here to go to the real time video and where you can paint along.
Happy Fall Painting!
If you want to be informed of the latest tutorial released subscribe to the VIP list. Just fill out the form in the bar above. No need to fill this out if you are already a subscriber!