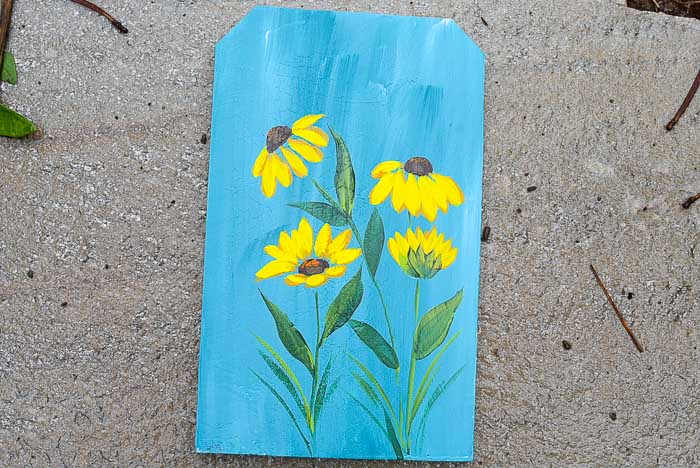
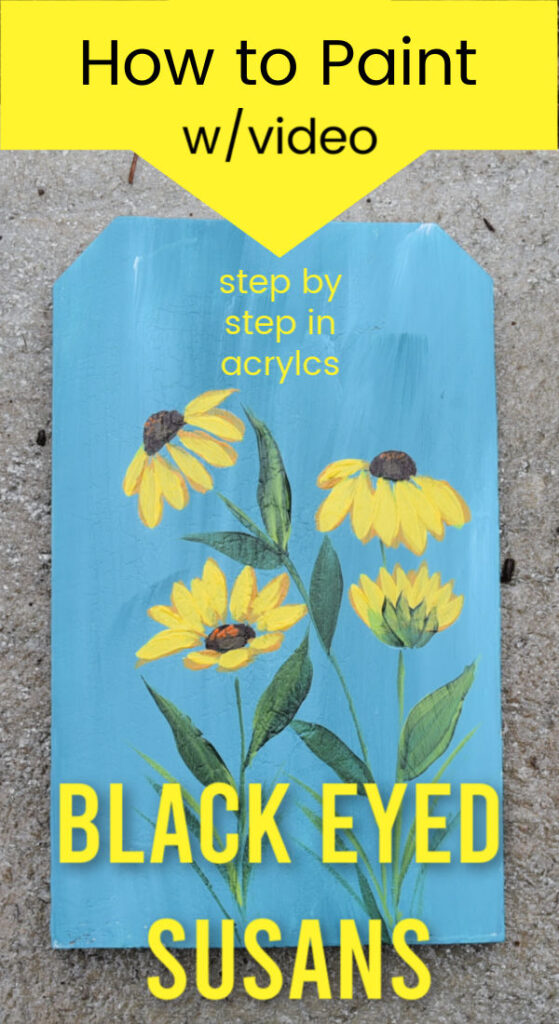
How to Paint Black Eyed Susans
Let’s learn how to paint Black-Eyed Susans. An easy step-by-step painting lesson in acrylics. Beginner-friendly painting tutorial you can learn quickly. These flowers are used in the Wildflower painting workshop coming soon to my shop.

Bright vibrant yellows bring a pop of color and cheer to any canvas painting, DIY sign, or craft project you may want to use it on.
This post contains affiliate links. If you make a purchase after clicking a link I may make a small commission at no added cost to you.
Base Paint Surface
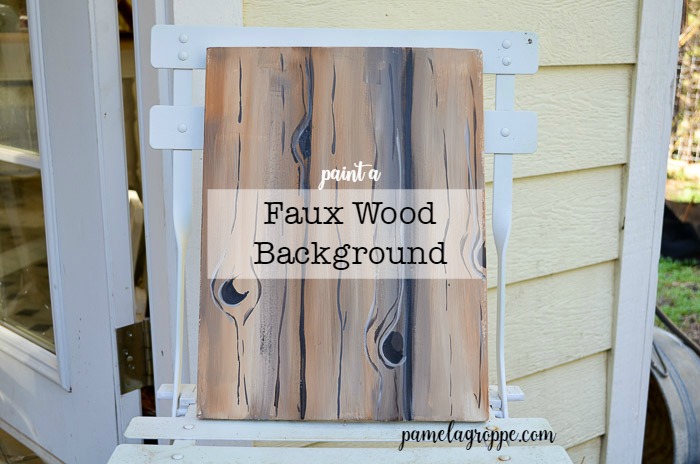
Using Plaid Folk Art Midnight Garden and Wicker white paint on a background using the method in this post: Painting a Neutral background
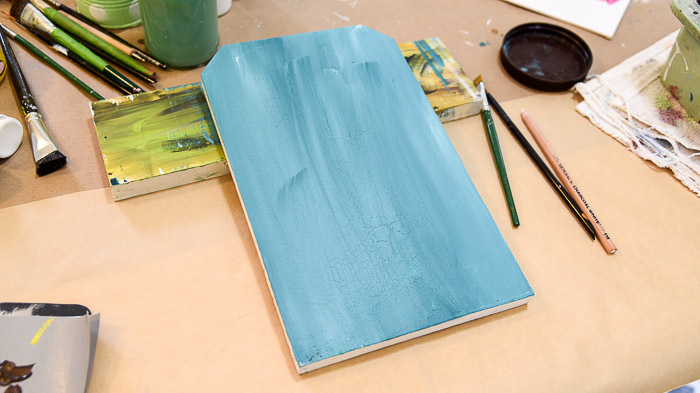
For this lesson, I used a piece of cedar fence board that had been sanded well. You can use a gallery-wrapped canvas, piece of wood, or a Mix Media pad.
Let background dry.
Paint Black Eye Susan centers
Use Burnt Umber and a #10 flat or #8 filbert brush to fill in flower centers. (or use brush of choice)
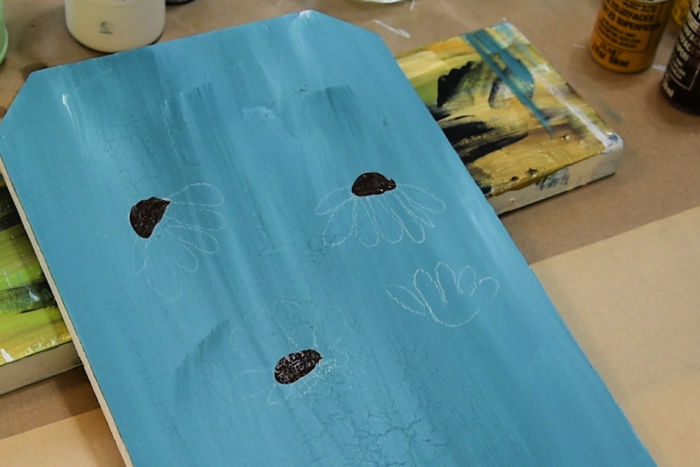
Make some centers cone-shaped and others oval to create the illusion of flowers facing different directions.
Undercoat Flower Petals
For this step, you can use the filbert or the flat brush. In the video below (end of post) I show you how each makes a slightly different shaped petal.
Use Yellow Ocher for this step.
To paint the petal you press the paint brush at the start of the petal and pull towards the center. Decrease the pressure on the brush and slightly twist to the side as you approach the flower center.
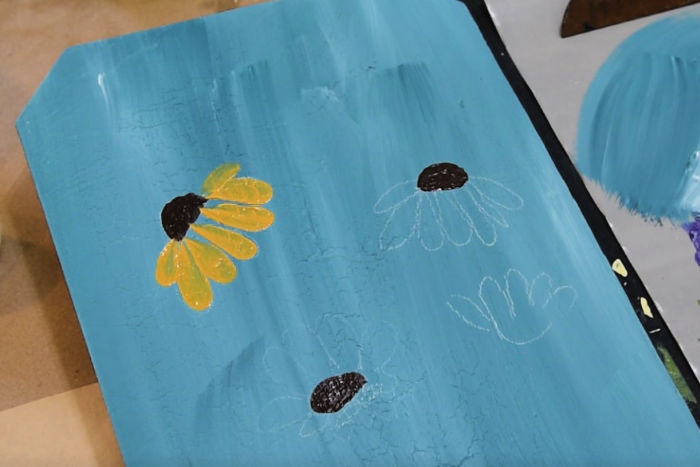
This will create a narrower end on the petal.
Paint all the flower petals. The lower left flower has truncated petals, meaning they are horizontal strokes under the center to create the look of the flower facing away from us a bit.

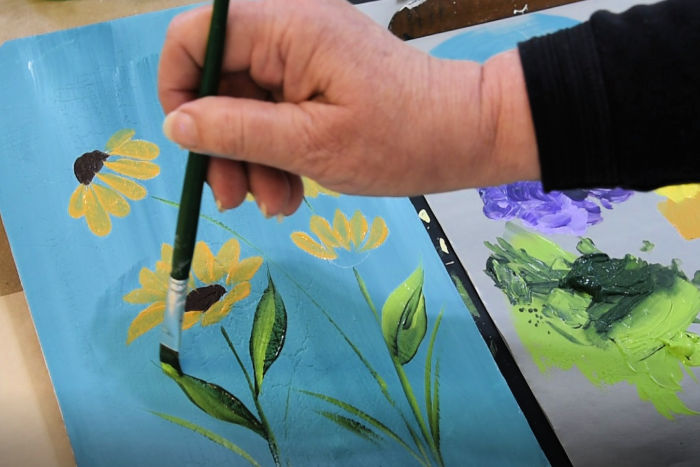
Paint Stems and Leaves
While the Yellow ocher dries you can paint in the stems and leaves.
Want to know more on painting leaves, see this post.
Double load your #10 flat brush with Thicket and Citrus Green
(need to know more on loading and basic brush strokes, see this lesson.)
Pull long stems in the direction a flower seems to be going for the stems using the chisel edge of a brush.
The leaves are a simple stroke start on the chisel edge from the stem. Drag the brush gently to create a narrow beginning then gently press down to widen the center of the leaf.
Next lift the brush towards the end of the stroke to create a pointed leaf tip.
If you wish to create just a dark leaf then use only the Thicket color in your brush.
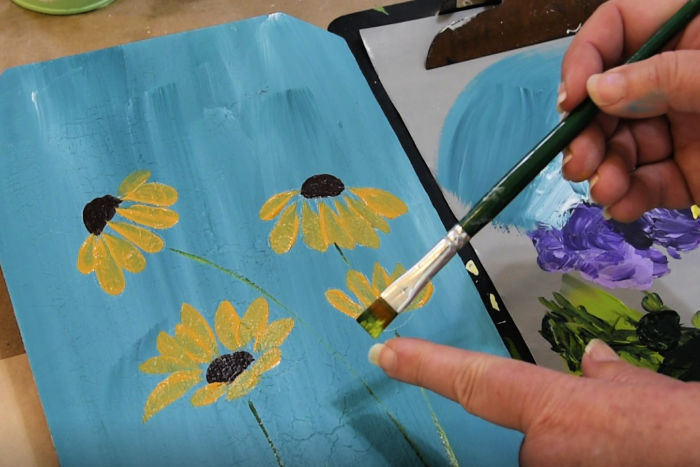
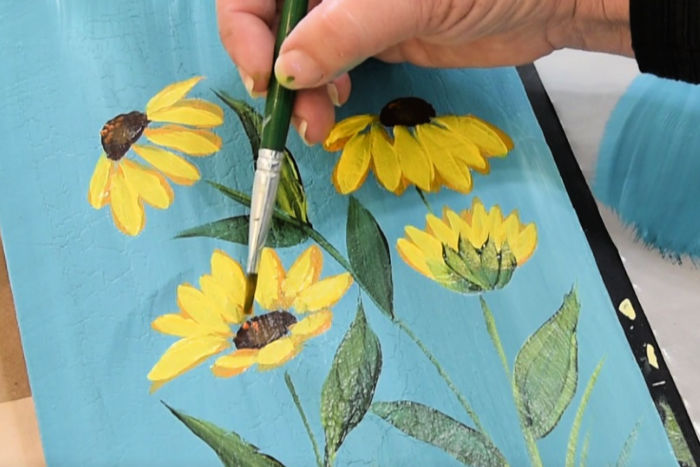
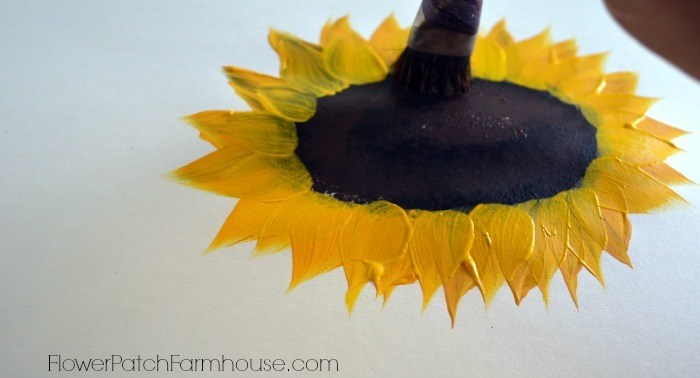
Brighten Black Eyed Susan Petals
Using Daffodil yellow and the #10 flat (or filbert) stroke over the Yellow Ocher to create a brighter petal.
Don’t worry about trying to cover the Yellow Ocher completely, just stroke over it randomly. This will let the YO shine around the edges creating a shadow and some depth.
Paint Bud
The bud petals are painted in the same manner as the flower petals yet they all come to the point of the stem.
After the petals dry add the calyx which holds the petals together with short chisel strokes with the Thicket. (this is better explained in the video)
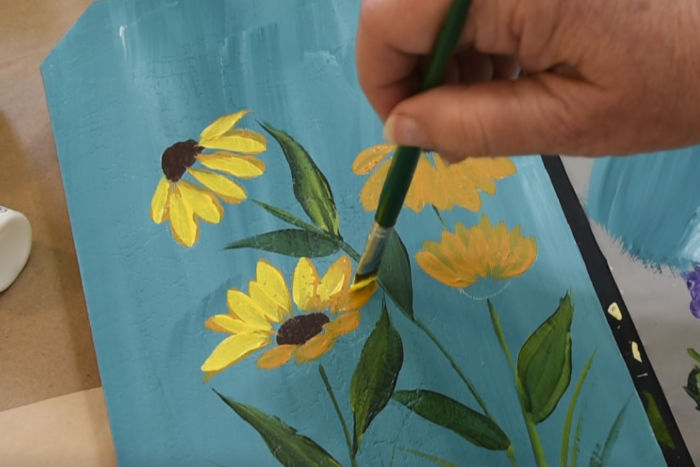
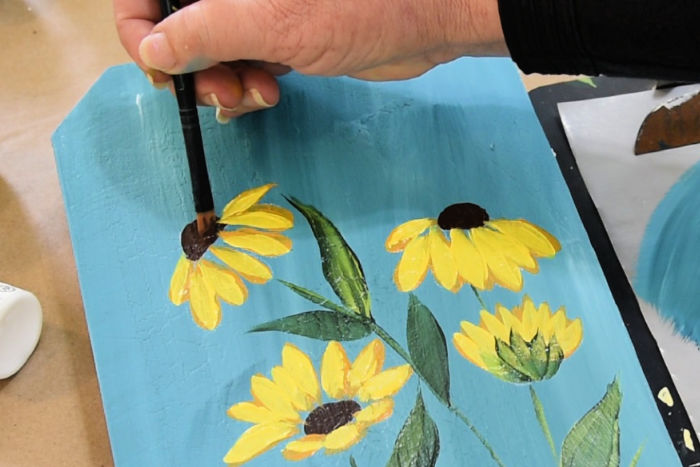
Clean up centers of flowers
Using Burnt Umber touch up the centers where the yellows encroached into it. Just dab the paint in where needed.
You can see the flower below the one I am painting in this photo still has little yellow points coming into the center, this is what we are covering with this step.
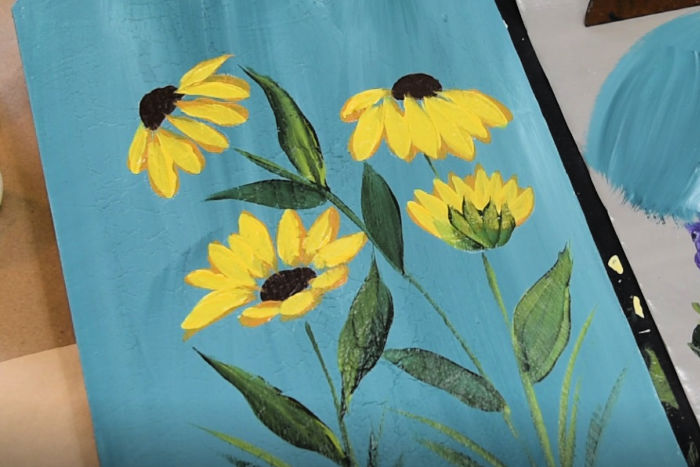
Add a spark of light
Using Pure Orange and the corner of the brush or a stylus tap in a touch of light. It will be subtle but a nice touch.
You could also use the yellow if you prefer.
Finishing up
Let everything dry well then varnish or clear coat with a protective finish. On signs I use this Spar Urethane and for Canvas paintings I use this Varnish by Liquitex
View the video to paint along
Be sure and sign up for updates when new lessons and workshops are added. Its free and easy to unsubscribe if you no longer wish to receive the emails.
Paint Black Eyed Susans in Acrylics
How to paint Black Eyed Susans in Acrylics
Materials
- Paint brushes: One stroke flat #10, Royal Majestic #8 filbert
- Surface of choice
- Plaid Folk Art paint:
- Midnight Garden
- Wicker White
- Burt Umber
- Yellow Ocher
- Daffodil Yellow
- Thicket
- Citrus Green
- Pure Orange
Tools
- #10 Flat Brush
- #8 filbert Brush
- Liner (optional)
Instructions
- Base paint surface of choice
- Paint flower centers in Burnt Umber
- Undercoat flower petals with yellow ocher
- Paint stems and leaves in Thicket and Citrus Green
- Add brighter yellow (daffodil yellow) to flower petals
- Paint calyx for flower bud
- Re coat flower centers to hide petal tails
- Add highlights to flower centers with Pure Orange
- Seal painting with a varathane or varnish
Recommended Products
As an Amazon Associate and member of other affiliate programs, I earn from qualifying purchases.

Happy Painting!
Please PIN and Share this, spread the painting love!
Love this project,,,great job!!! Thank you for sharing.
You are most welcome. It is a nice little flower to add to so many things. So sunny and bright, plus so easy!
Very cute Pam!
I think this will be my next painting.
Thank YOU!
I wondered what you were up to something since I hadn’t received a posting from you for a bit.
Thanks for the cheerful Black Eyed Susans!
Althea
You are most welcome. Yes, it felt like an age since I had posted a new painting lesson. I am trying not to let so much time slip by before posting again. I am so happy you like this one.