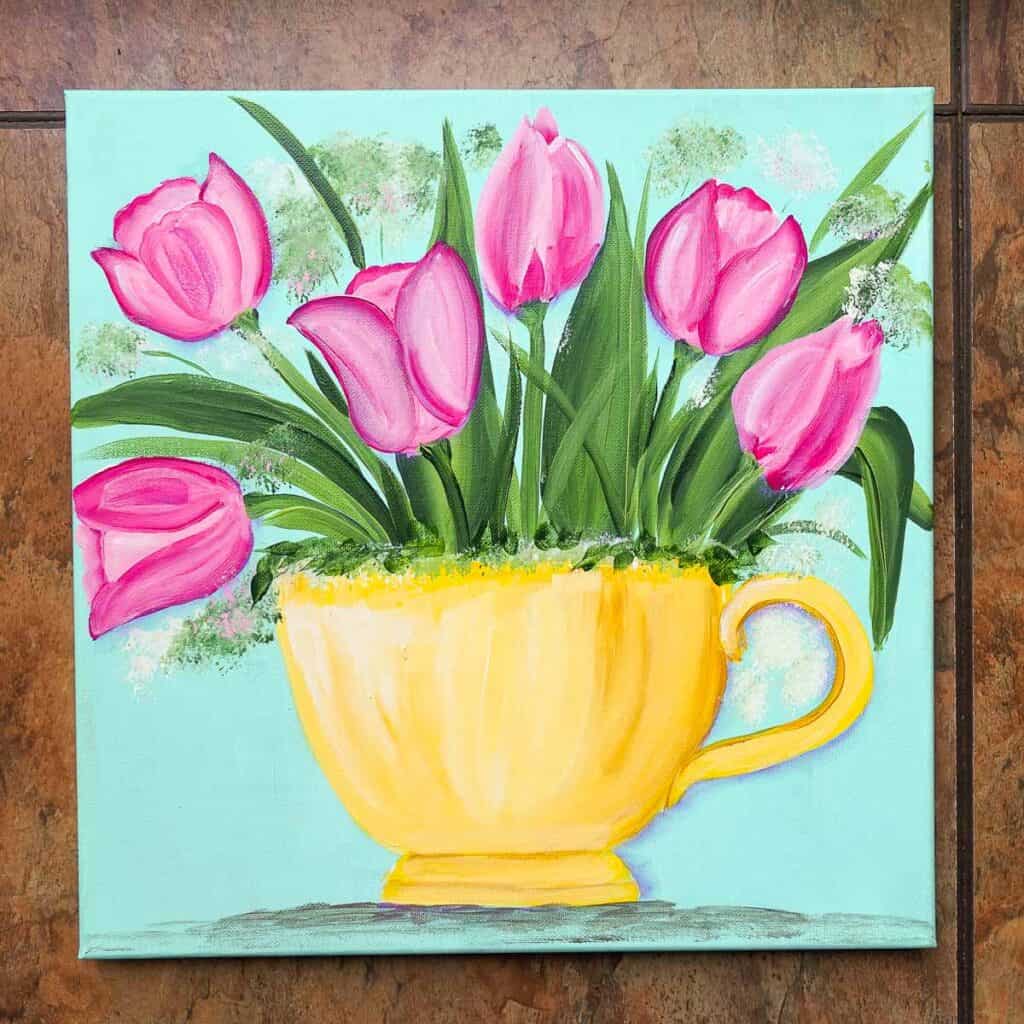
Paint Tulips in a Teacup
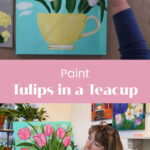
Learn how to Paint Tulips in a Teacup, one stroke at a time. Simple step-by-step painting tutorial that is beginner friendly!
Paint Tulips in a Teacup is a fun Spring painting tutorial. Now we know teacups are not this big but that is what is so fun about art. You can paint things however you wish! Whimsical and imaginative.
In this lesson, the minute marks of the video are noted so that you can hop on over to it if you need clarification on something. Watching the stroke or technique done is so enlightening if I don’t get it across in words. I hope you find this helpful.
Let’s get started!
Supplies:
You should be able to find the paints in stores like Michaels, Hobby Lobby and JoAnns. If not then try Plaid Online to order directly or Onestroke.com.
Paint Tulips Background
Using the 3-inch white nylon craft brush (wow, I just went to order more of the Loew Cornell and they have really jumped in price, I used to get them for $6 so I just ordered some different ones to test out).
You can easily do this background with a cheap sponge brush or sponge, see this page for background options!
Using Adrift and some Wicker White, paint in the background. You want it streaky so don’t over-blend. (feel free to use colors of choice, this is just what I used, don’t be afraid to branch out and experiment!)
I bought these canvas at Michaels and they work great. If you break down the cost per canvas you can see they are affordable so easy on the budget yet a good quality. I recommend adding two more coats of Gesso to them for best performance.
Let dry.
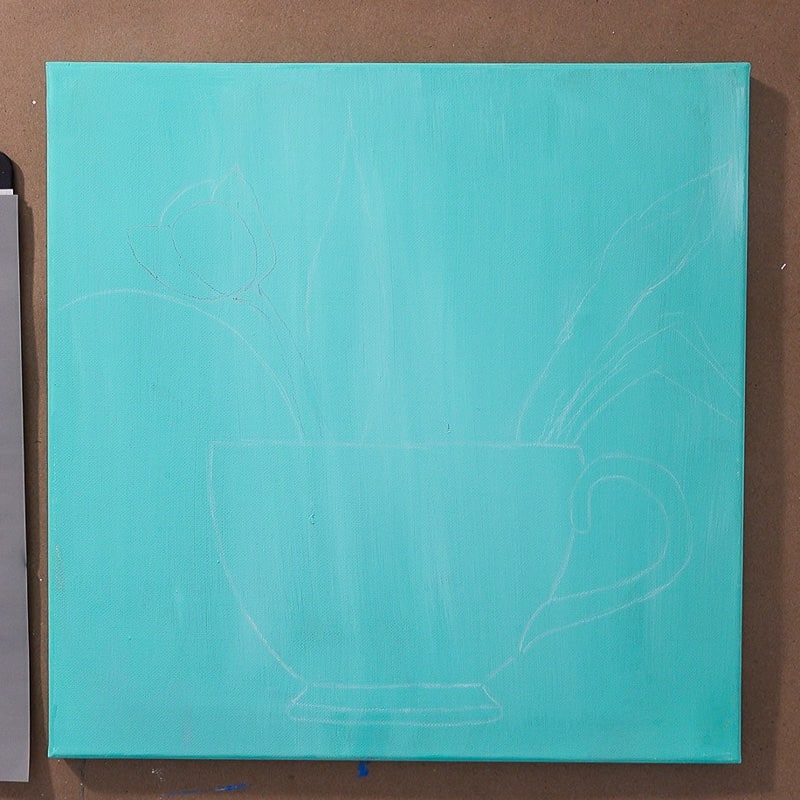
Once the background is dry sketch in your teacup and leaves. Or transfer the pattern to the background.
I started to put in the tulips but stopped when I realized I would be covering some with the leaves so I wait to put in the rest.
Create Tulip Leaves
Double-load the 3/4″ flat brush with Clover and Fresh Foliage, add a touch of Sap Green to the corner of the side loaded with Clover.
Stroke in long tulip leaves. Curve some, make some skinner, some shorter. Mix it up. Need more help, visit this post on painting leaves.
The video is great for showing how this is done at the 7:20 minute mark.
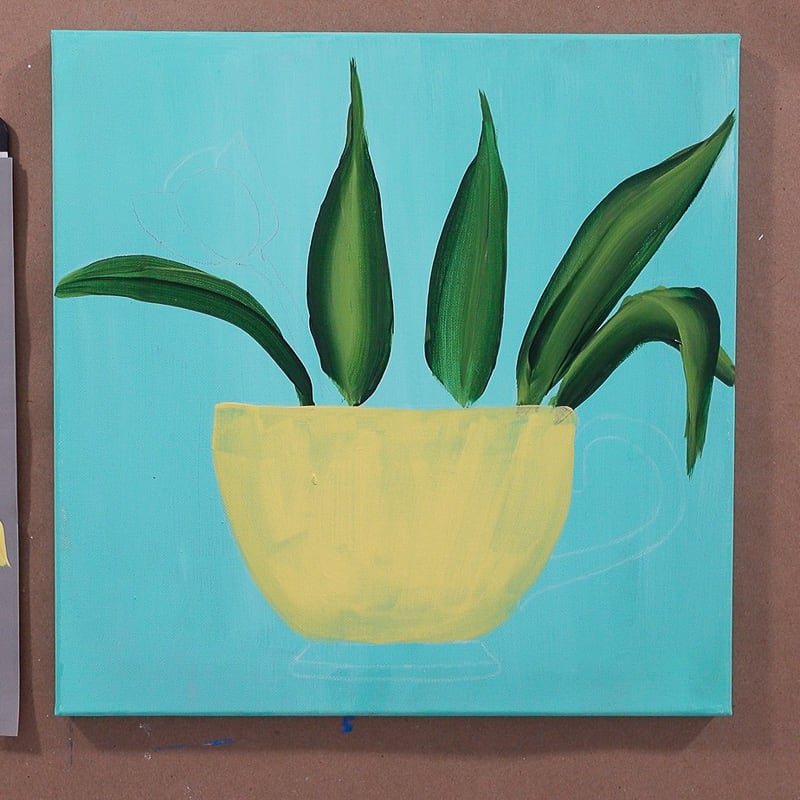
Fill in the teacup with Pale Yellow or you can choose to under paint it in Wicker White before adding the Pale Yellow. Let dry.
Under Paint Teacup
In the video I just started the cup with Pale Yellow but I wasn’t getting the coverage I wanted. So you can do as I stated above, just start with Pale Yellow or begin with an under coat of Wicker White.
Bring in some shading to create dimension. On the tea handle using a double load of Yellow Ocher and Pale Yellow stroke along one edge with the #12 or #10 flat brush. Make sure the connection to the cup is emphasized without being to stark. See the video at the 26:minute mark to watch me do it.
See this post for more Brush Stroke terms and help.
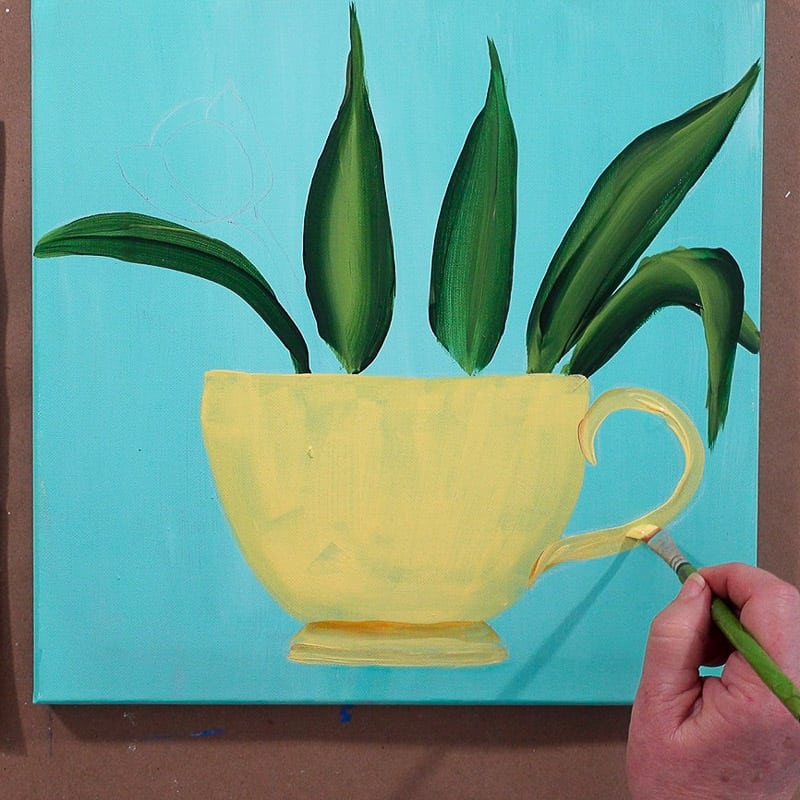
The base of the teacup is painted the same way adding a bit of Yellow Ocher to the brush to create some shading.
Base paint Tulip Flowers
Pink is not opaque and to keep the colors cleaner and brighter under paint the tulip flowers with Wicker White.
Add a touch of Magenta or Baby Pink to the corner of your brush keep your petal lines clear.
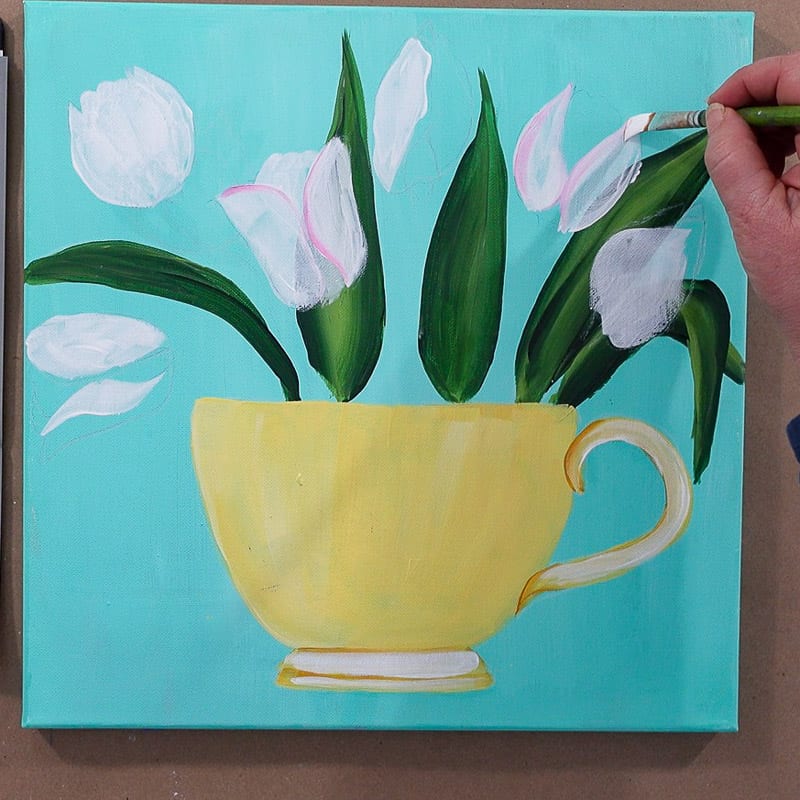
Do this to all the tulips and let dry. You can see here that I went in with some Wicker White on the handle and base of the teacup. I was not getting the opacity and needed some better coverage. Going over it with Wicker White helps that.
(FYI: this step could have been avoided if I had under painted the entire cup with Wicker White before painting the Pale Yellow)
Add some highlights to the left side of the cup by adding some Wicker White to the brush with the Pale Yellow and some shading to the right side by adding some Yellow Ocher to the brush. I show how I do this at the 32:25 minute mark of the video.
Paint Back Layers of Tulips
In painting, we build from the back to the front. Paint the back petals on the tulips with Magenta and Baby Pink.
You can decide if you want Magenta on the outer edges or Baby Pink. Just remember you will need to use the contrasting color on the petals that will lap over these.
See the 51:24 minute mark of the video
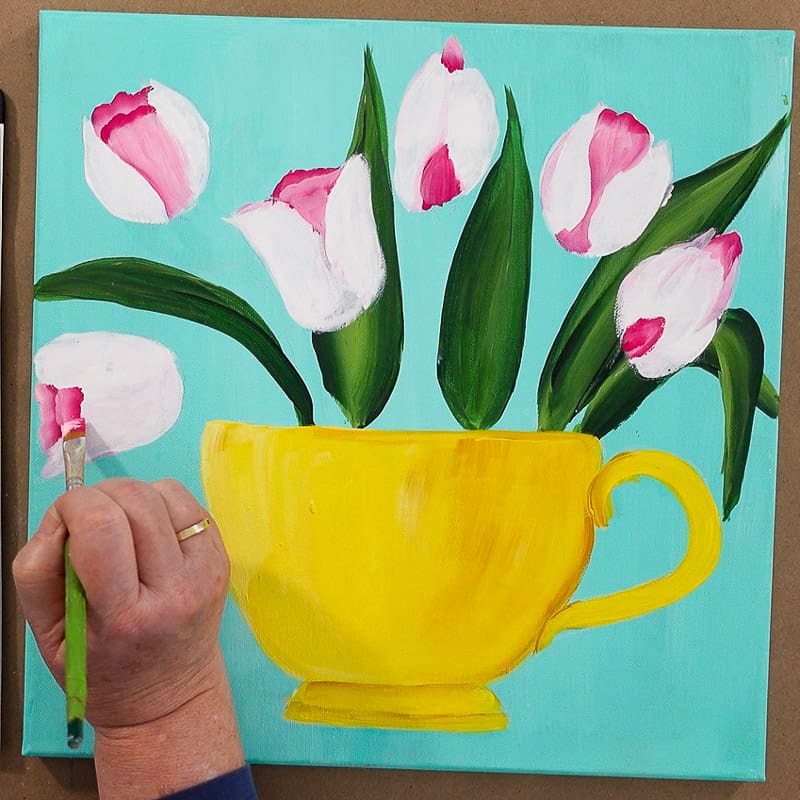
And you will note the painted Daffodil Yellow on the teacup. The Pale Yellow was too drab and needed brightening. This will be toned down with another coat of Pale Yellow but the Daffodil underneath will bring Pale Yellow up a notch.
Add Front Petals of Tulips
Next use the same colors, Magenta and Baby Pink (in the video I also use Bright Baby Pink but I found little distinction between the two) and paint your front petals.
In the video I used a touch of Berry Wine on the Magenta side and later decided it was too harsh so I don’t recommend that.
Later I went back over them with just Magenta and Baby Pink.
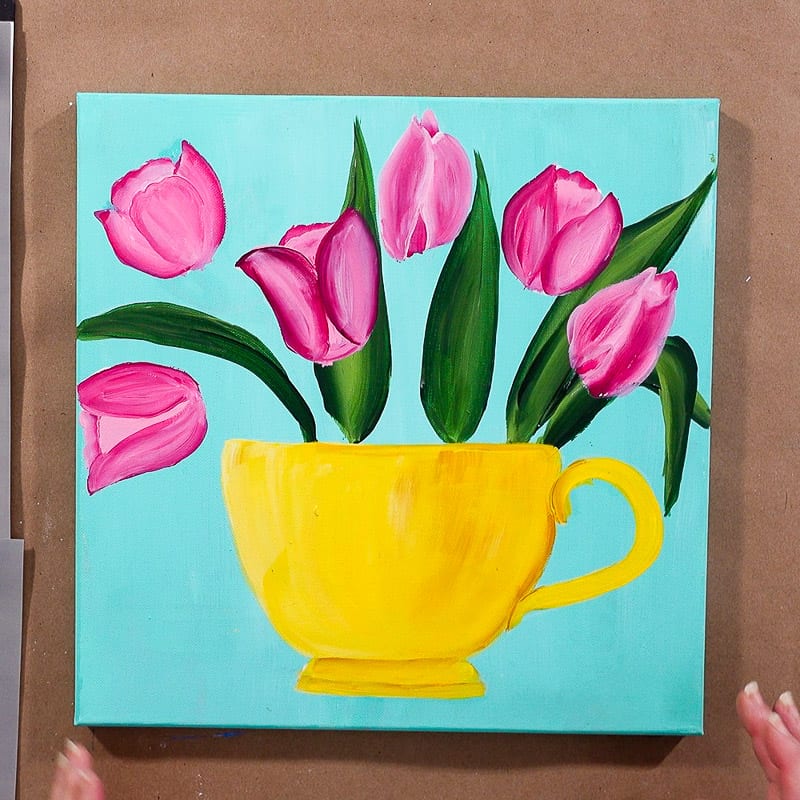
If you are getting hard edges, blend it bit more.
Add Texture to Background
This is optional. I ended up not liking this after it was all said and done and will go in and change it.
That will be a different post about changing things after the fact but since it is a part of this painting now I will share how to accomplish it.
Load the 3/4″ dry scruffy brush with some Wicker White and pounce in some frothy bits. Just a little, we want it airy.
Wipe out the brush (do not get it wet!), load and pounce in some Fresh Foliage and repeat with a touch of Clover.
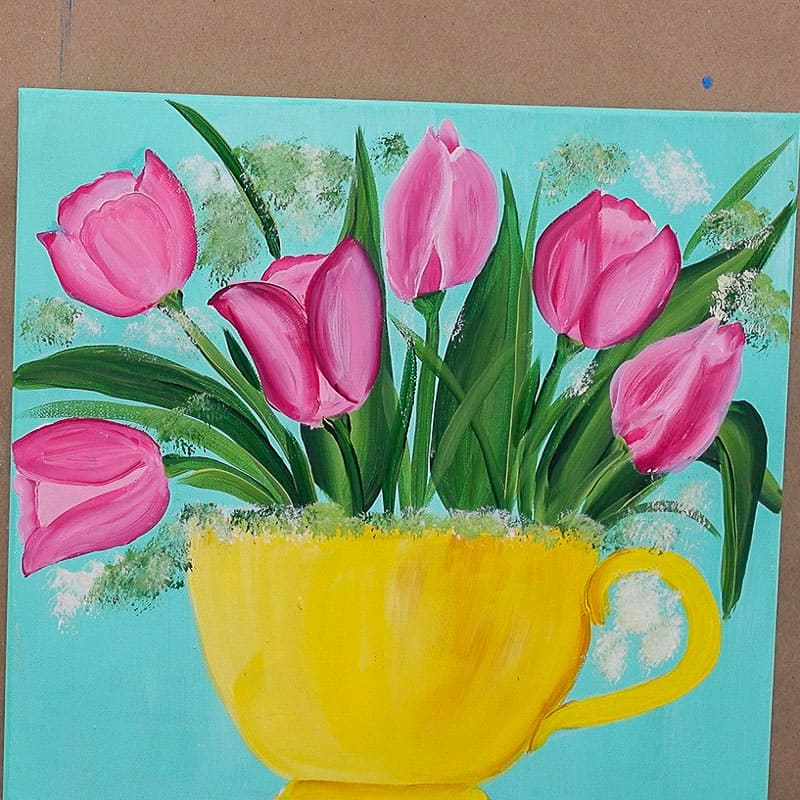
You can add some along the rim of the cup as well. Add a hint of pink in areas.
For flower painted this way that actually turn out see this: How to Paint Queen Anne’s Lace
Finishing Touches
Recoat the cup with some Pale Yellow to tone it down. Using the 3/4″ flat brush and Pale Yellow, add white as you paint the left side of the cup as a highlight and Yellow Ocher on the right for shading. Follow the shape of your cup with the strokes. The cup handle is painted with the #10 flat, as you stroke in the handle add a touch of Yellow ocher along the inside edge of the handle. Just a tiny touch.
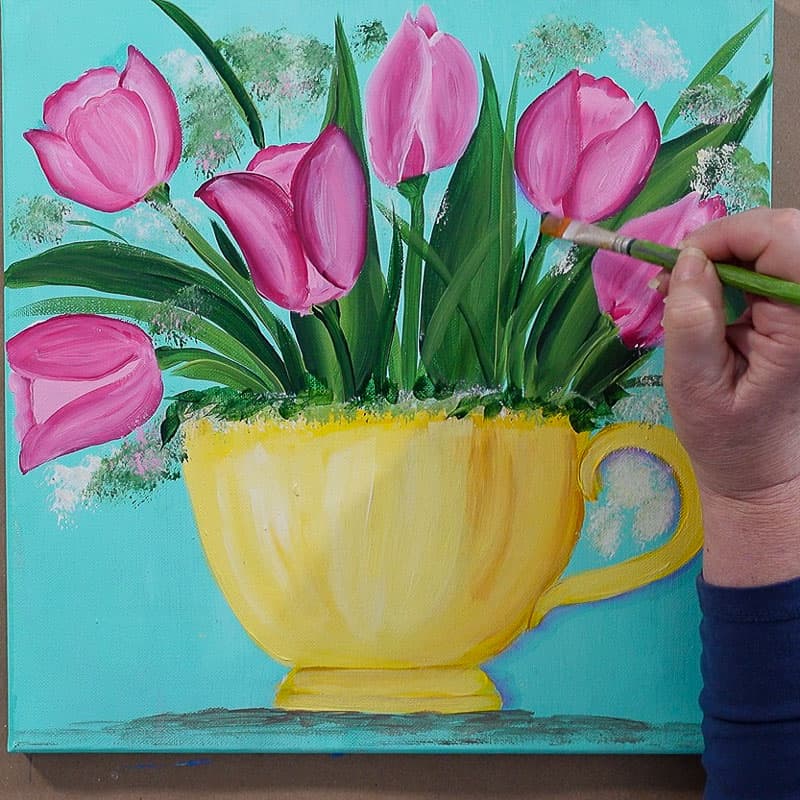
Double-load the #10 Flat brush with Fresh Foliage and Clover. Using the chisel edge of the brush paint on the stems of the tulips. See video at the 1:15:45 minute mark.
Glaze on some color under the cup to indicate a surface or you can paint a table top as I did in this tutorial Paint Boots in Acrylics.
Optional: Add shadowing along the edges of subjects with a float of lavender and floating medium.
As you will note, I did not do this painting perfectly and had to adjust when things did not go as I had planned. Leaving it imperfect and showing how to fix when facing an issue is a great way to let you know that sometimes a design can have some missteps. I am hoping that showing how I had to go back and redo some things encourages you to just press forward and not be discouraged when something is not coming out as planned.
Find the traceable and downloadable workbook here!
I love your paintings n appreciate your kindnessf n sharing n teaching with patients also. Love them all !!!
Thanks so very much!!!?