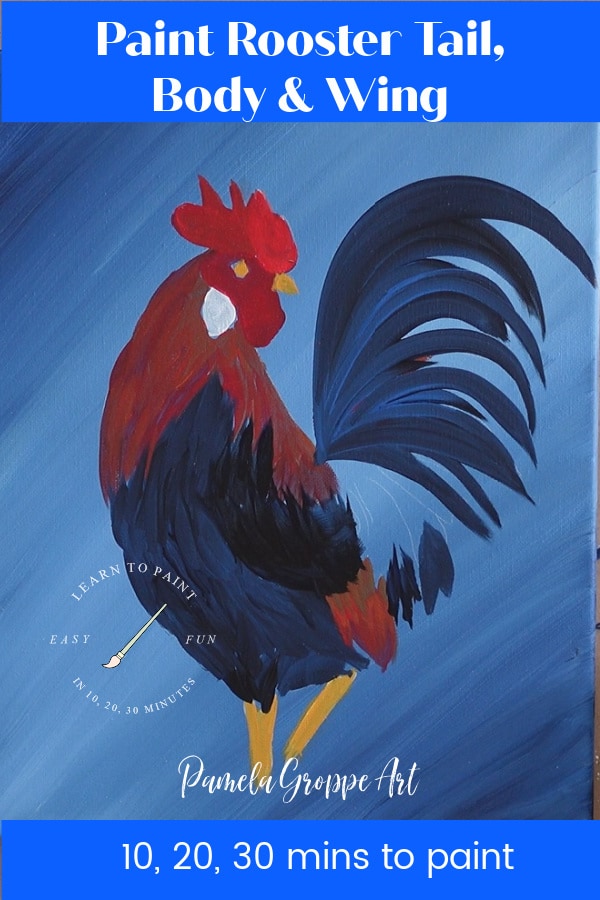
Paint Rooster Tail and Body
Paint rooster tail and body in black with some blue for beautiful shading. This lesson is part of the 10, 20, 30 minutes to paint series for How to Paint a Rooster.
Lets paint the Rooster tail and body today! This lesson is about 13 minutes long on video but part of that is your practice session for the tail strokes.
This post contains affiliate links. If you make a purchase after clicking a link I may make a small commission at no added cost to you.
Supplies:
Canson Multi Media Pad
Donna Dewberry One Stroke Brushes (we will be using the 3/4″ flat brush)
Plaid FolkArt Paint
Prussian Blue
Licorice Black
True Blue
Practice Painting Rooster Tail
This step is optional but it can help you get the feel of how to move your brush and how your colors will blend. On the Mixed Media page just paint on the same background as the Rooster background lesson.
Just brush it in loosely, this just gives you a bit of color so you can see how your painted tail feathers can look.
Double load the 3/4″ flat brush with True Blue and Black. Need help with double loading…Press here to See the post BASIC BRUSH STROKES.
Lead with the black and the True Blue follows. Starting on the chisel edge of the brush, slide upwards and increase the pressure as you bring the brush up and over, thus widening the stroke. Lift as you come to the end of the stroke which will make the stroke narrow again and is the end of the tail feather.
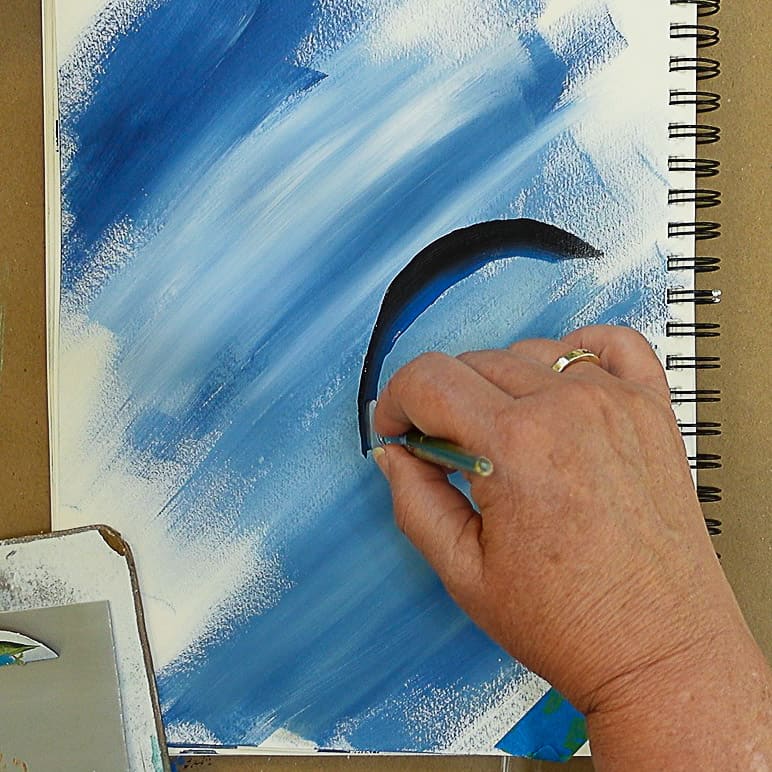
Practice this with the different colors. You will load the brush with Prussian Blue and Licorice Black for some feathers, then Prussian Blue and True Blue, then Licorice and True Blue. Be careful with the Licorice, if you over blend or add too much it will obscure the blue.
When first laying down the Prussian blue with the Licorice it will seem like there is no difference, let it dry then look at it and you should see the difference.
Paint Rooster Tail
We are using only the 3/4″ flat brush for this portion of the lesson so keep that in mind as I will now just say load your brush.
Double load your brush with the colors. When you watch the video you will note I switched between the black, Prussian blue, and True Blue. Vary at will, this is your rooster. When you practiced you should have determined how much black or blue you wanted to use.
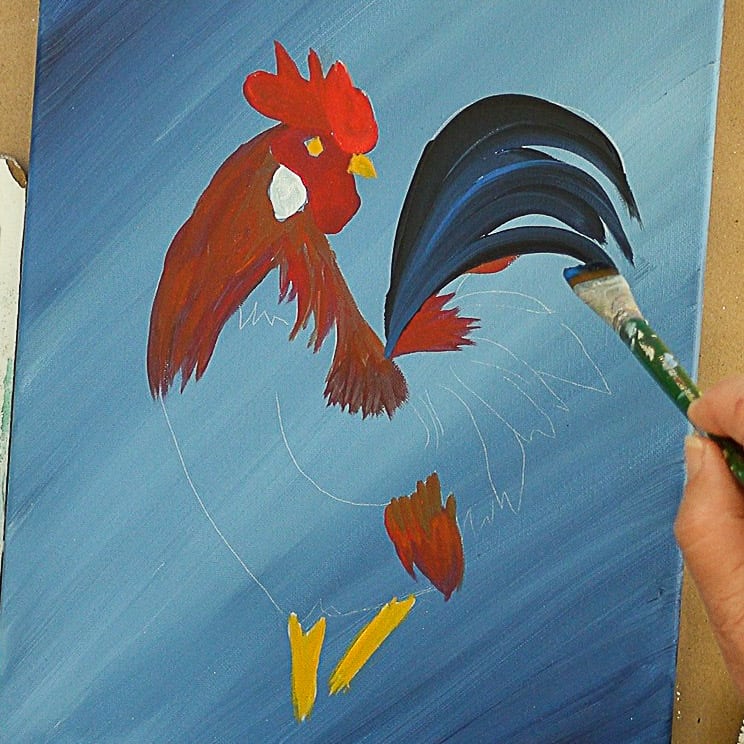
Follow the outline loosely, don’t try to fill in every single line. The drawing is a guide. In the video, you will note I added another feather to enlarge his tail overall as that is what I felt it needed after stepping back and surveying it.
And you can see the extra tail feather in the photo below.
Paint the Rooster Body
Double load the brush with Licorice Black and Prussian Blue, using the chisel edge of the brush make choppy strokes building from bottom to top. This will give the body texture.
Don’t worry about gaps, just layer the strokes. Rooster feathers overlap each other and that is the effect you are going for.
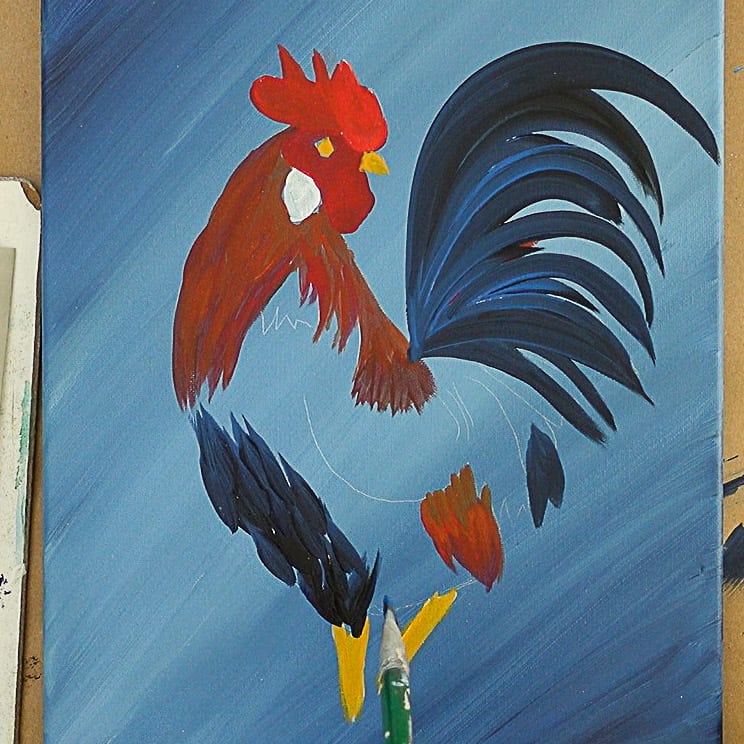
This is an effect not reality! I can’t emphasize this enough. Don’t get caught up in perfection. Just stroke on the colors and relax. This is fun art not a competition.
Look at those striations of color, great definition and interest.

Paint Rooster Wing
Add more Licorice Black to your brush and chop in some strokes on the wing following the curve. I wanted the wing to be defined so I made it a bit darker.
An option is the make the bottom line of the wing darker then fill in with colors similar to the body.
Add some small choppy strokes at the end of the feathers behind the red/rusty portion. The black tips will show under the golden feathers when we paint those in later.
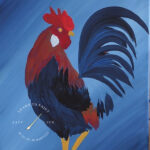
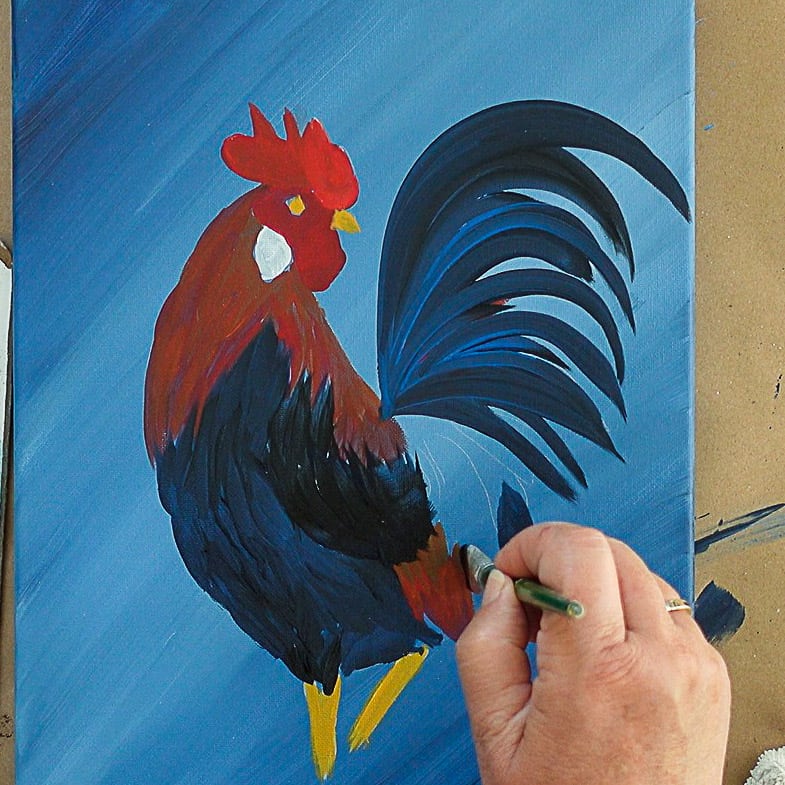
Your rooster should resemble this.
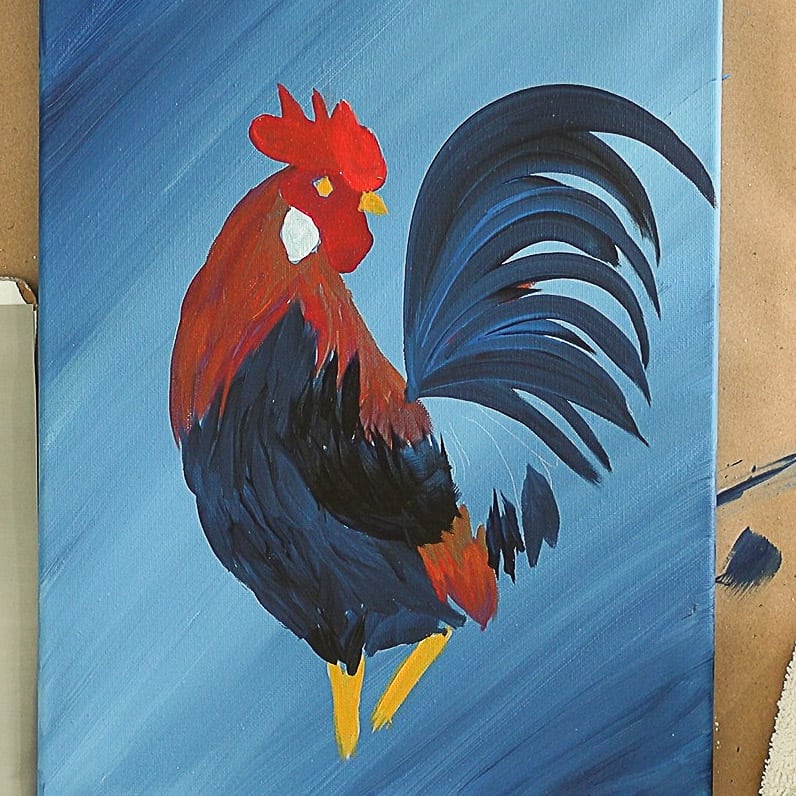
Remember, no two paintings are exactly alike so don’t try to be a carbon copy of mine. That will only frustrate you. Enjoy the learning process and take delight in your version of this Rooster painting!
Next up we will bring in the golden feathers.
For the step by step video click on photo below: