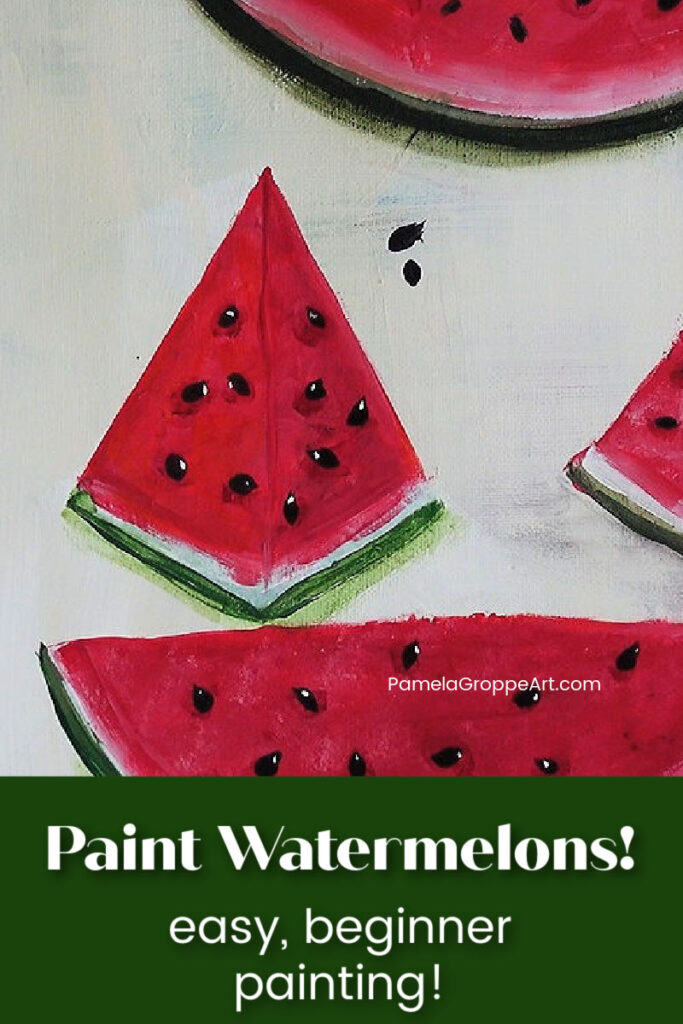
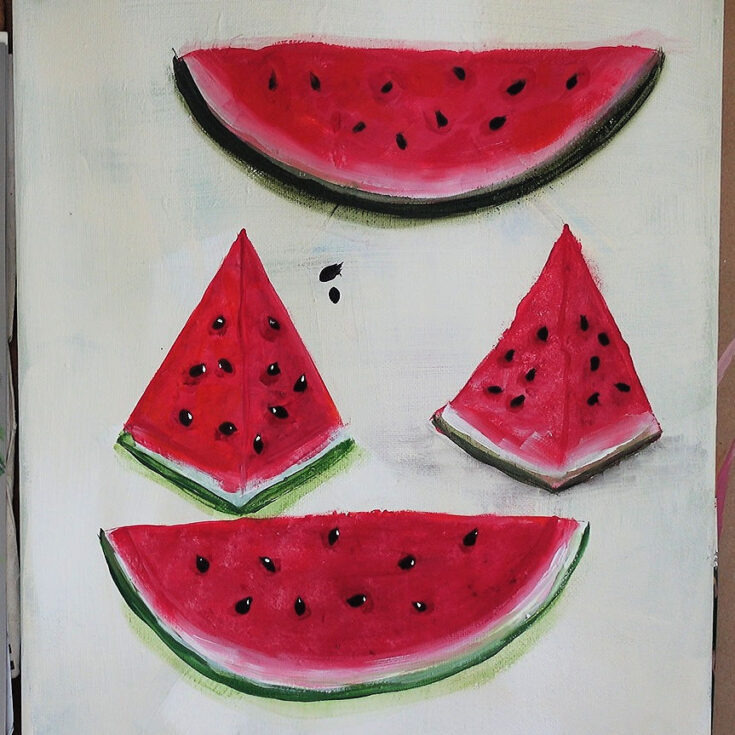
Paint Watermelon
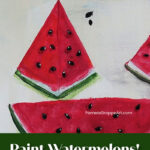
Let’s paint watermelon. In this tutorial, I share how you can paint watermelon in acrylics quickly and easily. Beginner friendly and fun!
There is also a how to paint watermelon video that you can watch to really see how easy it is. You can do this so let’s get painting!
For this painting, we will be using Folk Art Craft Paint. You can use what colors you have that are similar.
A traceable and complete supply list is available at the end of this lesson.
Transfer the design to your surface and undercoat with wicker white. Let dry or speed up with a blow dryer.
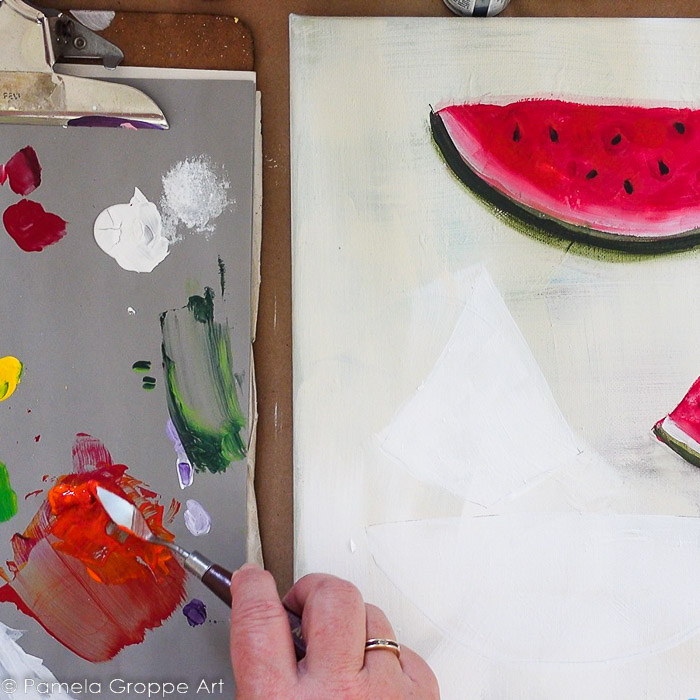
Mix some Engine Red with Pure Orange, about half and half. This is to create a warm red for the base coat.
Base Paint Watermelons
Using either the 3/4″ flat brush or the #12 flat (your choice) fill in with the Orange Red mix you just created. Keep about a quarter inch above the rind line.
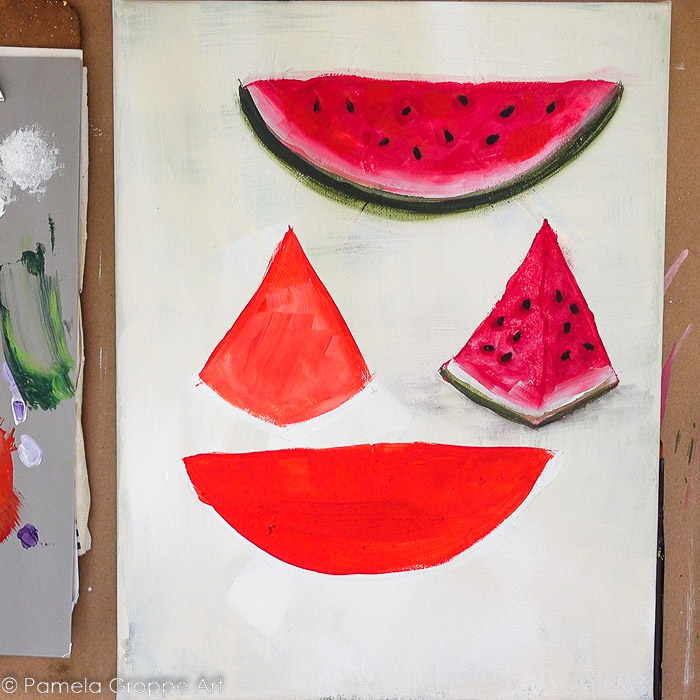
The white undercoat of the triangle-shaped melon slice was still wet and it blended in. I worked around this but ideally let the white undercoat dry well before proceeding.
Paint Watermelon Flesh
Watermelons can range in color so no need to overthink painting them.
Next up pick up Engine red and slip slap it on the watermelon. As you work the color onto the melon pick up a touch of Wicker White on the very corner of the brush.
Not a lot, you don’t want to turn it pink. You just want a touch of mottling.
On the slice also add a touch of Berry Wine to the right side of the melon.
Using the chisel edge and some Engine red paint a staggered line down the middle of the melon slice. (the triangular one)
Don’t know what I mean by chisel edge, see this lesson…
learn the terms and strokes
EASY BASIC BRUSH STROKES
Learn how to paint basic brush strokes and terminology so you can paint many designs easily.
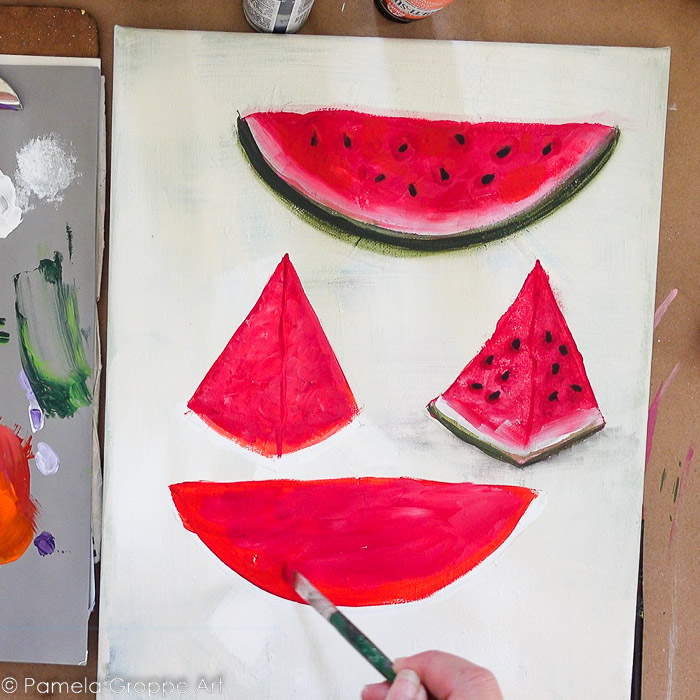
Paint Watermelon rind (white portion)
Clean your #12 flat brush. Pick up Wicker white and pull it along the rind edge. Make it choppy so it isn’t just a line of white.
If you feel you get too much white, side load some Engine Red with the White and touch it up. (the video linked below demonstrates this well)
Let the white dry.
Paint Green Watermelon Rind
Load the clean brush with Sap Green, you can double load with the Hauser Green Medium but that is optional.
Using the chisel edge of the brush pull the green along the outer edge of the white ring portion.
Work it along and make it a width you feel appropriate. As you can see my practice watermelon at top has a wider rind.
Don’t get caught up in being perfect, just have fun. This is not realism.
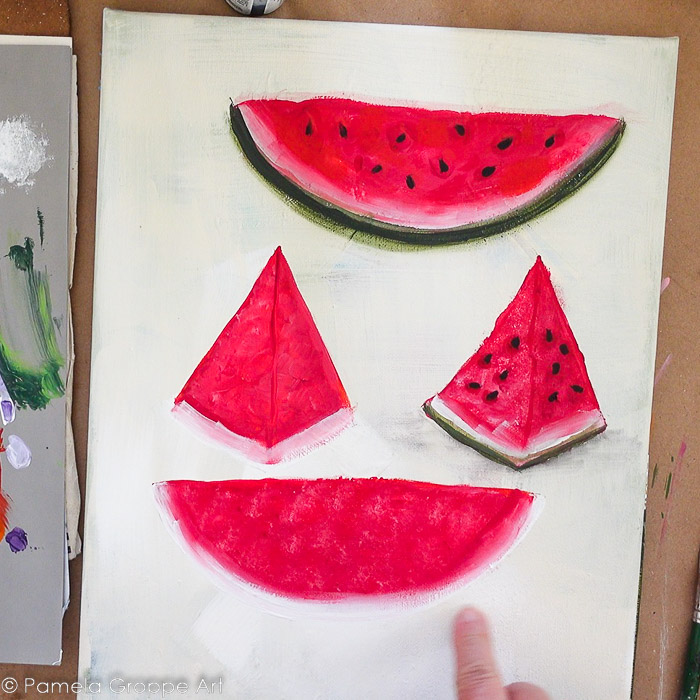
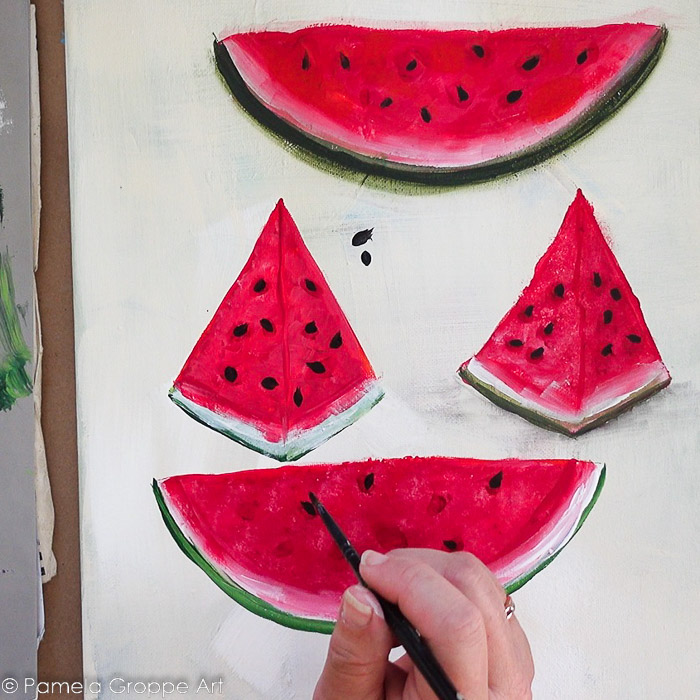
Glaze to shade and brighten
Ignore that the seeds have been painted. This step should be done before you paint the seeds. I just got ahead of myself and created a problem that I want you to avoid.
You will see it in the video but for now lets just do the glazing before we paint the seeds.
Mix a touch of Berry Wine with glazing medium and brush on the right side of the watermelon slice to deep the color just a touch.
Wipe out the brush and now load with Apple Red and glazing medium and brush over the left side. This gives it a touch of dimension.
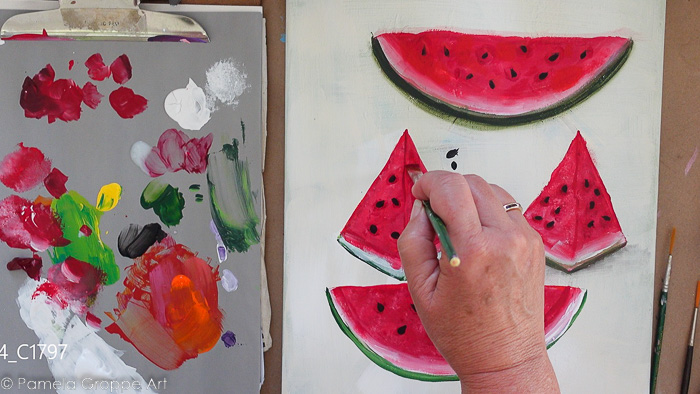
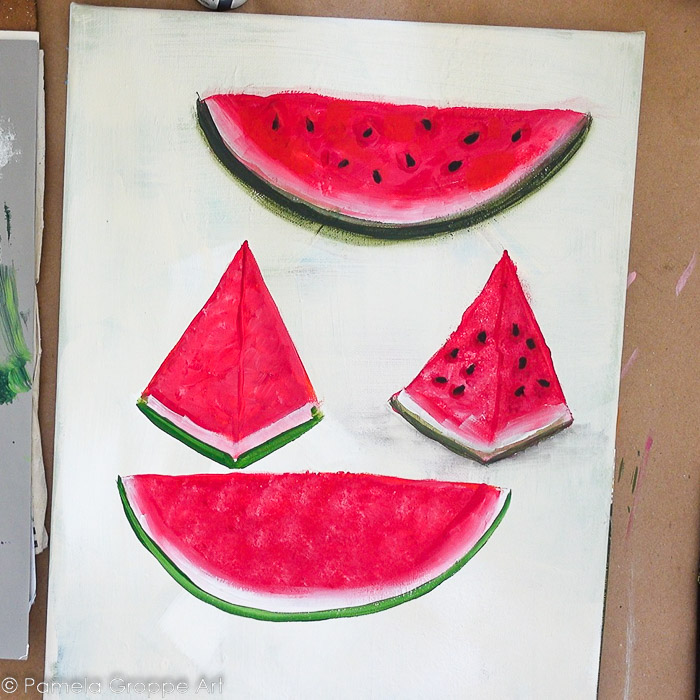
Painting Watermelon Seeds
Place some glaze on your palette. Load your #4 filbert or the corner of a flat brush with some glaze, dip into some Berry Wine and mix to create a glaze of color.
Create small divot areas where the seeds will sit. This will help set them back a touch.
Using the filbert or the corner of your flat brush, load with Licorice or your black paint of choice.
Into the divots make small ovals with a bit of a point on one end to mimic the shape of watermelon seeds.
Using the liner and Wicker White touch a highlight onto each seed. A tiny touch will do the job.
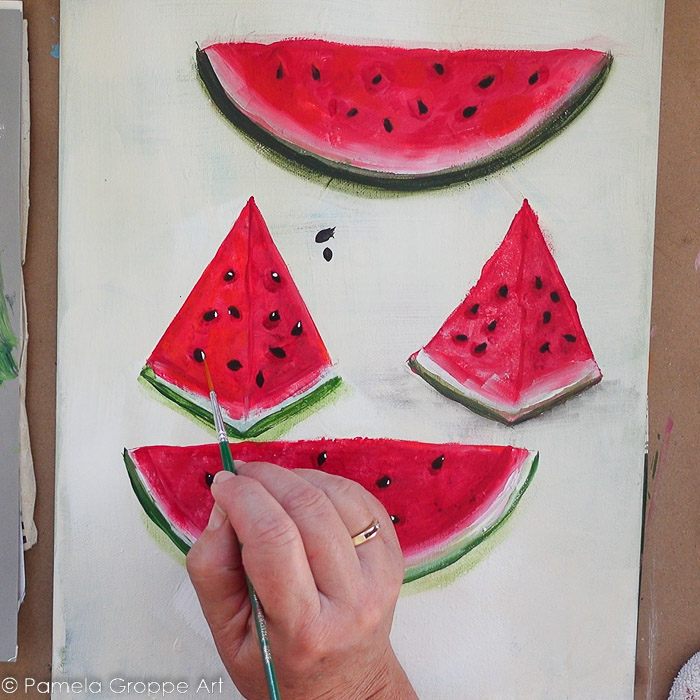
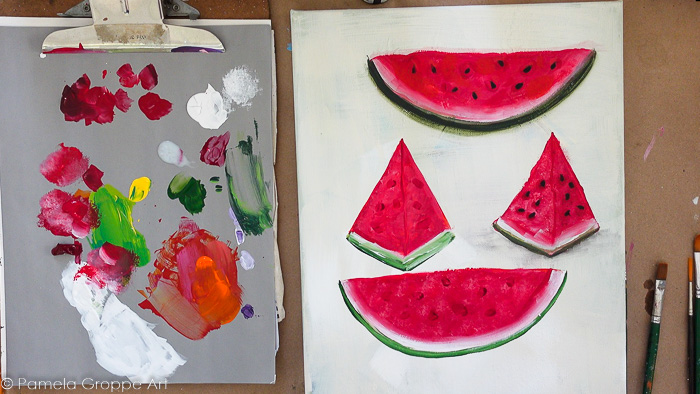
And now you have painted your watermelon in two different shapes. In the video, I also demo how I use a sponge to get a mottled effect you may like too.
Enjoy the video and grab your traceable below!
Grab the Traceable pattern now, it is right here!
Paint Watermelons in Acrylic
Easy step by step watermelon painting tutorial for beginners, paint and supply list.
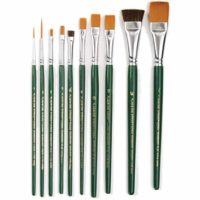
Materials
- Surface of Choice
- Plaid Folk Art Paint colors
- Engine Red
- Apple Red
- Berry Wine
- Licorice
- Wicker White
- Sap Green
- Hauser Green Medium (optional)
- Plaid Folk Art Glazing Medium
Instructions
- See blog post for instructions
Notes
You can easily swap out these colors for similar colors. These are what I used in this lesson.
Recommended Products
As an Amazon Associate and member of other affiliate programs, I earn from qualifying purchases.
Please PIN and share!